
Shoeboxed Knowledge Base
Submission Methods
How can I scan and upload my documents?
We know that you like to do things your way. That's why we offer a variety of ways for you to submit your own scanned documents to Shoeboxed. Just make sure they are one of our accepted file types (.gif, .jpg, .pdf, and .png).
Web Uploader
You can find the web uploader here, or in your account click on the Add document button in the top right. Then simply drag and drop documents into the box, or select the documents you want to add to Shoeboxed.

You can forward any receipts to your personal Shoeboxed Email Address. To find/edit your personal Shoeboxed email, visit Account settings. Scroll to the bottom to change your Shoeboxed Email Address Pin for easy memorization. This is convenient for any stores that you regularly make purchases from because you can have your settings automatically forward those receipts to Shoeboxed.
Note: If you set up your scanner to email scanned documents automatically, we would recommend to set the email to your work or personal email address first, then you can forward to your Shoeboxed email. That way you can keep a record of documents that are emailed by your scanner.
Gmail Receipt Sync
Our Gmail Receipt Sync automatically takes all of the incoming receipts from your inbox and places them in your Shoeboxed account!
It's also SUPER EASY!!
Follow this link: https://gmailreceiptsync.shoeboxed.com/
Log in to your Shoeboxed Account
Link your Gmail Account and Authorize
Enjoy getting all of the receipts sent to your inbox easily uploaded to our software!
Note: The Gmail Receipt Sync is not retroactive, so it will only pull email receipts you receive after you have connected it.

Getting Started
How do I change my plan?
It's super easy to change your Shoeboxed plan at any time. Please make sure to read the benefits of your new plan before making a change, as features and turnaround time vary!
Here's how:
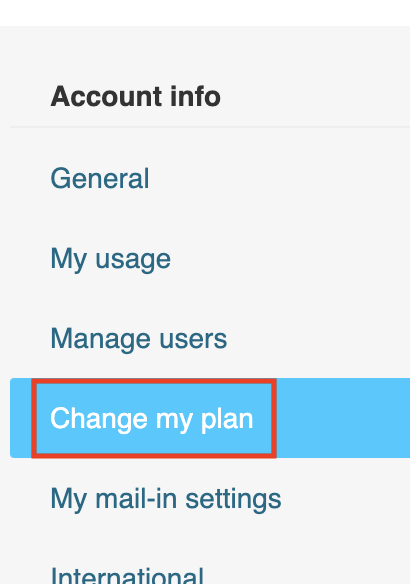
Log into your account and click your name at the top of the screen, then select Account settings.

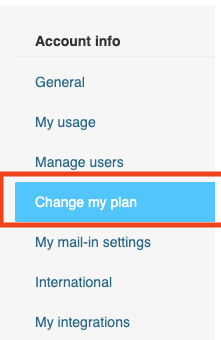
Click Change my plan.
From here you can select a new plan (monthly or annual).
Can I edit the information that is extracted from my documents?
Absolutely! All of the data that is entered from your scanned receipts and business cards are editable by you.
Although we strive for 100% accuracy in data entry, unfortunately, the occasional human error is inevitable. When this happens, it's simple to edit the information with your documents.
Here’s How:
- Select the document you would like to make changes to.
- Type in the editable fields on the left side of the document viewer.
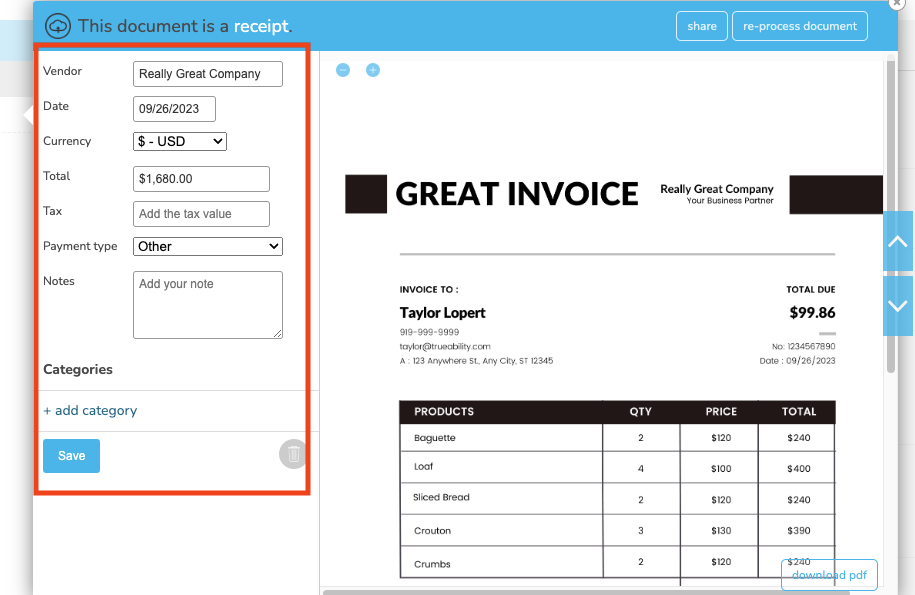
- When you're done typing, click the Save button. The screen will refresh once the save is complete.
How do I delete documents?
Check out the two ways of deleting documents from your account.
If the receipt is being processed
- Log into your online account and click Add document.

- On that page, you'll see a list of receipts that have not yet been processed. Click the one you want to remove and select Process Manually.
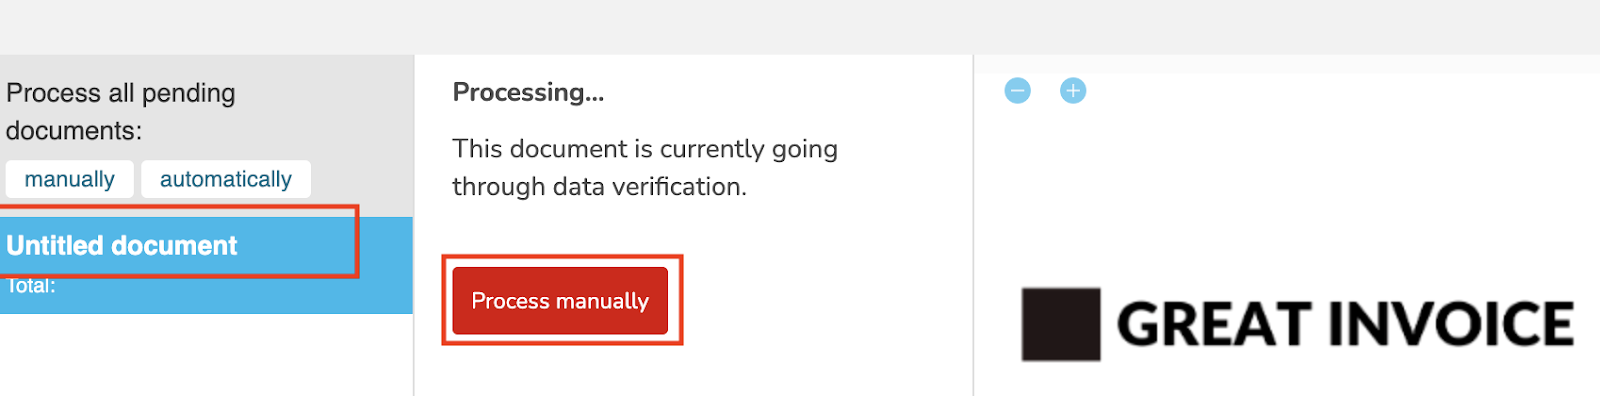
- Select the trash button.
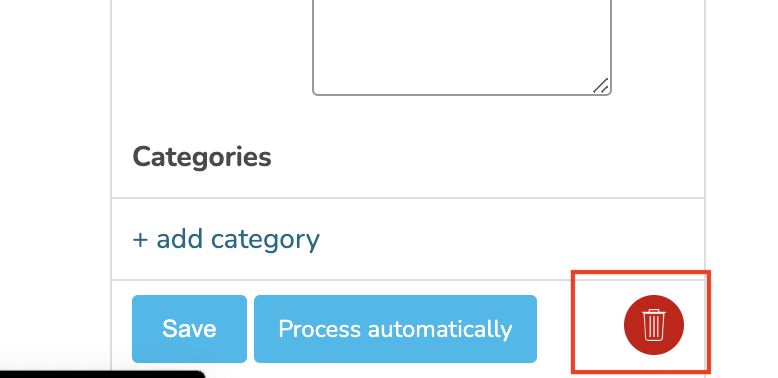
This will remove the item from our processing queue and keep it from counting towards your usage. Yay!
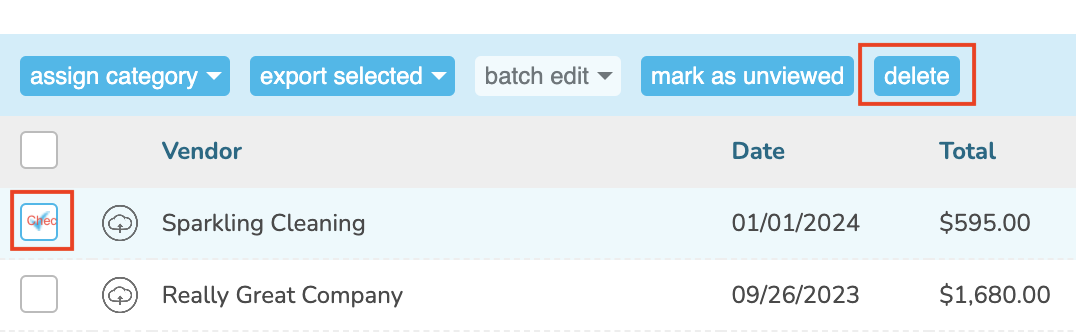
If the receipt has already been processed
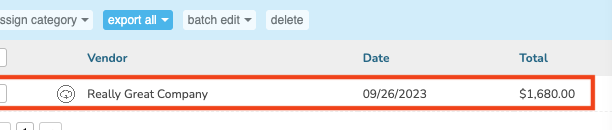
1.Log into your online account and click on the appropriate document type (Receipts, Business Cards or Other Documents).

2. Select the checkbox(es) next to the document(s) and select delete.
Still need help? Please contact [email protected] for any additional questions.

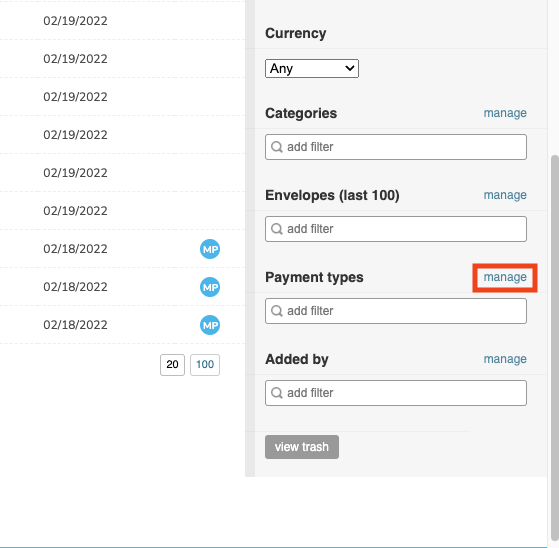
How do I add new payment types and edit or delete old ones?
With the manage tab above the payment type filter, you can easily create new payment types and delete old or incorrect ones.
Creating a new payment type
Simply select a receipt in the receipts tab so you can see the image, and click on the payment type drop-down.
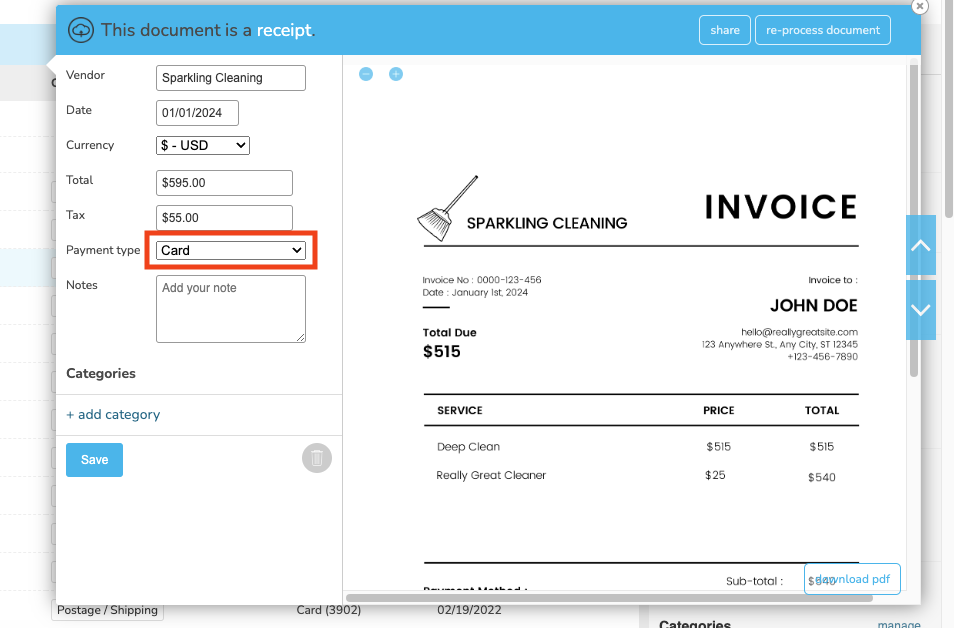
Then, select Add New Card.
Next, type in the last 4 digits of the card, and hit the Save button.

Editing an existing payment type
Go to your receipts tab, and select manage next to the payment type filter.
Then, hover over the desired card number, select edit on the right side, enter the new number and hit save.

Note: when editing a payment type, the updated card number will retain all categorization rules associated with the previous number.
Deleting an existing card number
Go to your receipts tab, and select manage next to the payment type filter.
Hover over the card and select the delete button.

Note: when a payment type is deleted, all category rules associated with it will be removed as well.

How do I separate personal and business expenses?
Do you already have your personal and business documents in separate bundles?
If the answer is no
Then just send your documents in to us, as they are! You can then mark your different types of documents easily using our online categorization system.
If the answer is yes
We do recommend separate accounts for personal and business expenses as it can get a bit confusing, but if that isn't for you, there is another way. Simply separate the different documents by using smaller envelopes, an elastic band, plastic sleeve or bull clip and put a note on the front that says “new envelope code”
When we receive the envelope you will then receive two (or more) confirmation emails - one for each envelope code created.
You should create a separate category for each entity - for example Personal Expenses, Business Expenses, etc. You can add and edit categories by clicking manage next to the Categories section in the filter bar in the receipts section.

Once the envelopes have been scanned you can use My Envelopes on the right-hand side of the Overview page to look at the contents of each envelope.

Identify which entity they are for, and then assign each receipt to the appropriate category.

When viewing receipts you can filter by categories.

In addition, our export feature gives you the ability to export only specific categories.


How do I create categorization rules for receipts?
Welcome to our new Manage Categories Section, check out the great features!
- Add New Categories
- Set rules to include vendors by category
- Set rules to exclude vendors by category
- Set default payment methods by category
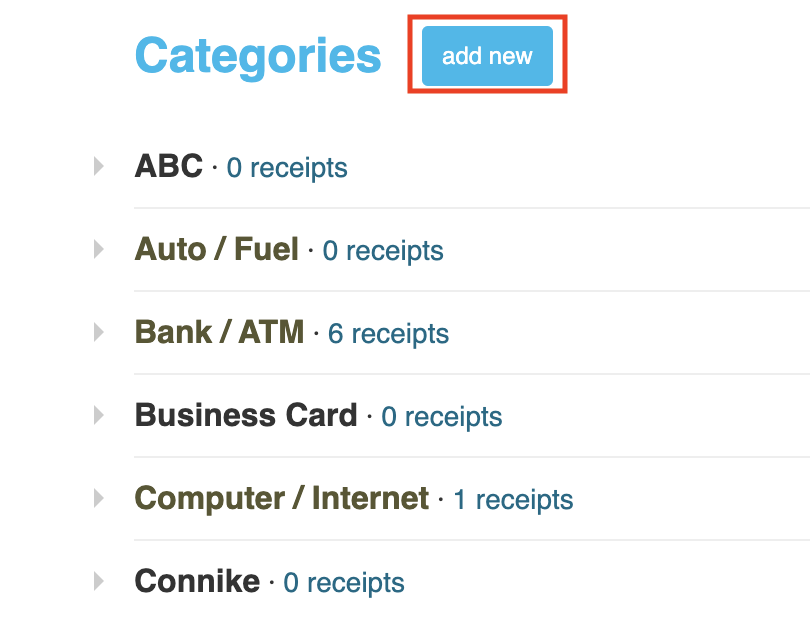
The first thing you will want to do is go to the manage categories section which can be found under the Receipts Section, you will then go to the right side of the page where the filter options are listed, next you will scroll down to Categories and select Manage.

Next you can add new custom categories by selecting the Add New button as shown below.
After you get all your categories added you may want to set some rules.
First you'll click the dropdown arrow beside the category you want to add rules to in order to expand the options.

The first option is to add a vendor to the Included Vendors List as shown below. This will allow you to have any receipts from this vendor to be automatically tagged with that category.
The second option you have is to add a vendor to the Excluded Vendors List. This will make sure that any time a receipt is processed from the vendor it will not be tagged as that category.
Lastly you have the option to set the Payment Process rule. This will allow you to have receipts from certain payment types to go into preset categories.
For example, if you have a card that you only use for your business and you want to make sure it goes into a specific business category each time you can set it here.
Note: Creating rules for your categories is not retroactive..
Does Shoeboxed categorize my receipts? Can I customize the categories?
Shoeboxed uses a sophisticated algorithm that reads the information on receipts to determine whether a receipt fits into any of our default categories. If it finds a match, it will automatically place that receipt in that default category.
Our 15 default tax categories are:
- Auto / Fuel
- Bank / ATM
- Computer / Internet
- General Retail
- Groceries
- Insurance
- Meals / Entertainment
- Medical / Health
- Office Supplies
- Postage / Shipping
- Professional Fees
- Promotion / Advertising
- Telecommunications
- Travel / Transport
- Utilities
Want to hide the default categories?
- Log into your account, click on the user icon in the top right and select Account settings.
- Select International on the left-hand column and deselect the checkbox next to the appropriate set of default categories.
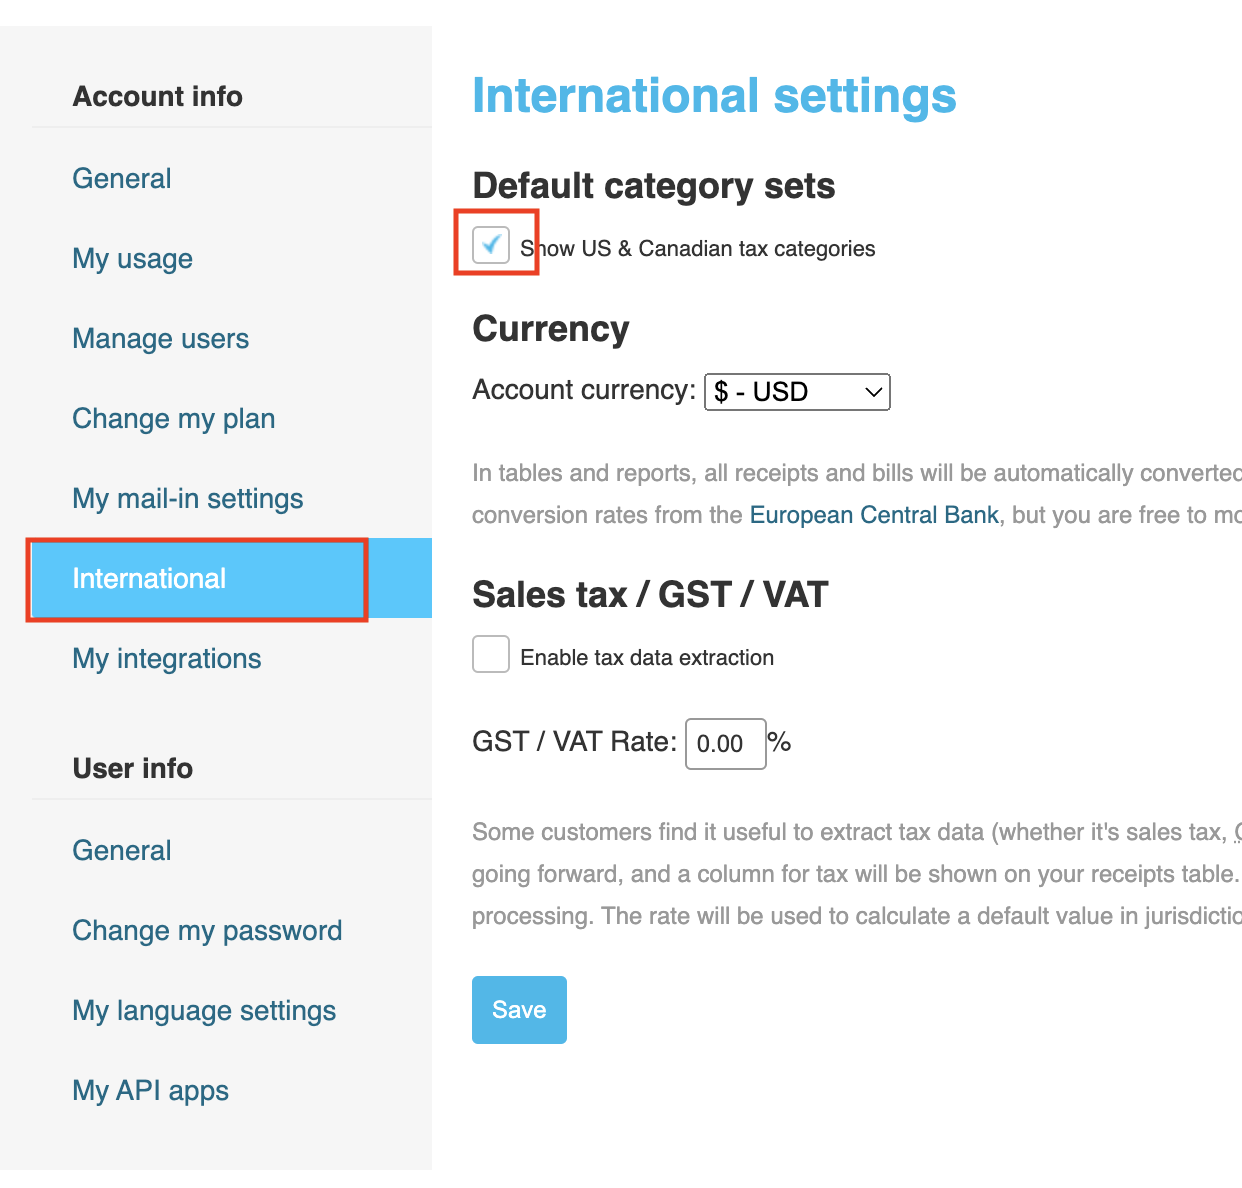
3. Select the Save button.
Categorizing Multiple Receipts at Once
- Log into your account and click on Receipts.
- Select the checkboxes next to the receipts that you want to add to a single category and click the Assign Category dropdown menu.
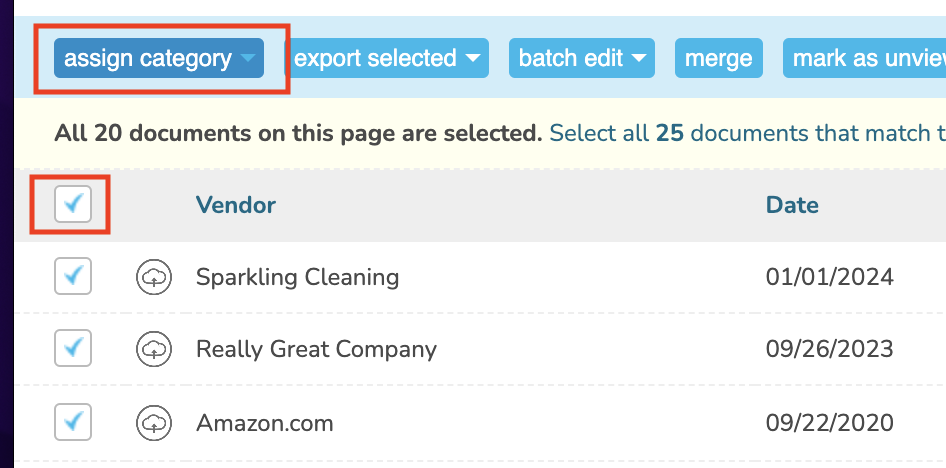
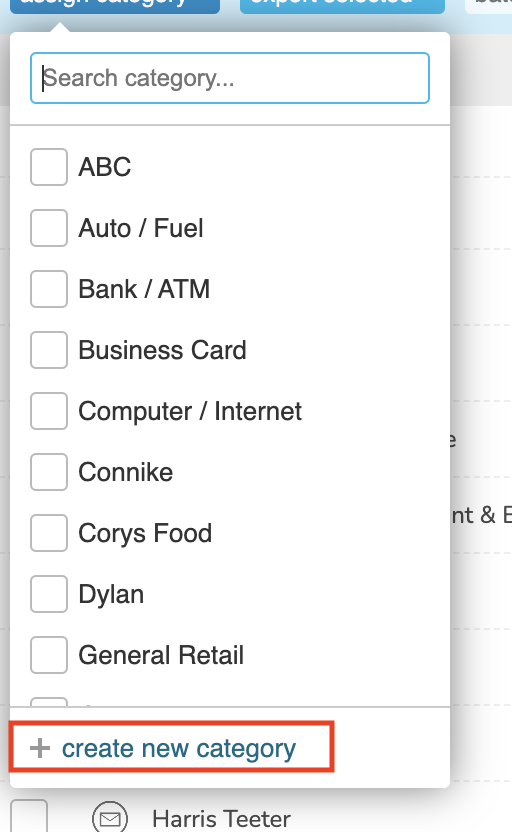
- In the Assign Category section, select the appropriate category. If you want to create a new category to add the receipt(s) to, choose New Category.
- Whenever you categorize a receipt, our categorization system will ask if you want to make rules to auto-categorize receipts from that same vendor in the future. To edit or add auto-categorization rules at any time, click on Manage next to the Categories filter. On this page you can add or remove rules by vendor.
Categorizing Other Documents
At this point, Shoeboxed only categorizes receipts, not other documents or business cards.
Using Categories to separate personal and business expenses
Check out this FAQ: How do I separate personal and business expenses?

How does the search bar in my Shoeboxed account work?
The search function is accessible by typing into the “Search Everything” bar in the top right corner of your account.

This tool searches the text that was extracted from your documents by our advanced Optical Character Recognition (OCR) software.
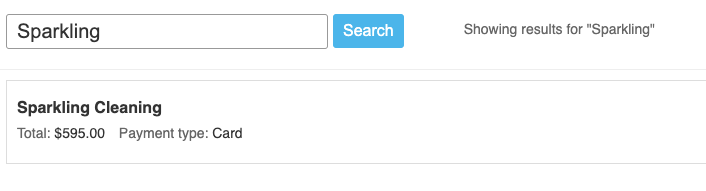
It also searches the fields that we manually enter from your documents. This can be extremely helpful for finding receipts by keywords that you know were printed on the receipt.

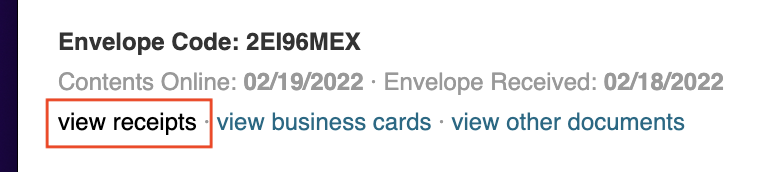
How can I view all of my documents from a particular envelope?
To view all of your documents from a particular envelope, click on the View Envelopes quick link on the right hand side of our Overview page.

Click View Receipts for the specific envelope you would like to see the contents of.
You can also filter by envelope using the filter sidebar in your Receipts page.

How do I change my email address?
It's easy to update your email address anytime.
Here's how:
Log into your account and select Settings in the top right corner.

Select General and follow the instructions.

Enter your new email address and click Save.

Reset my password
The first thing you should do is make sure that you are logging in with your email address and not your username. If you are still experiencing issues, check out the solutions below!
Forgot your password?
No problem. Just click here, enter your email address and you'll be emailed a new password within a few minutes.
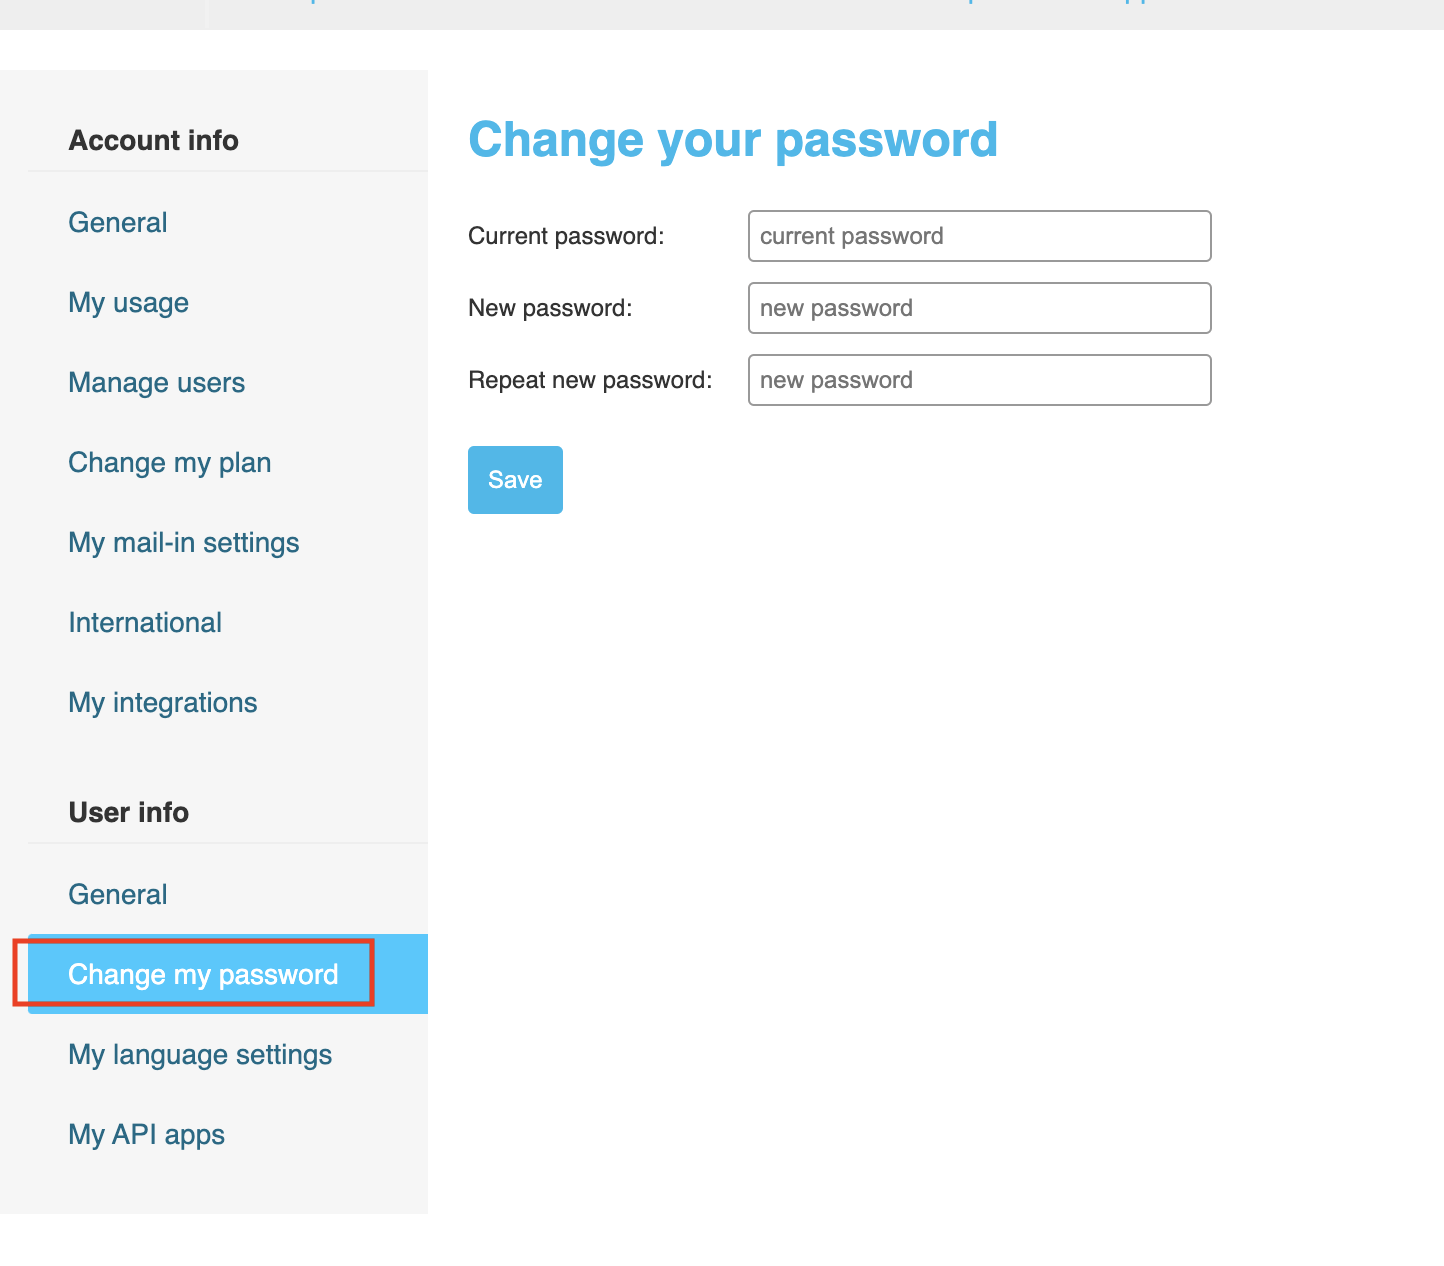
Want to change your password?
Login and Select Settings in the top right corner.

Then select Change my password.
Password reset not working?
Email [email protected] and our support team will have you logged back in in no time!

How do I update my billing information?
If your card has expired or you wish to use a different card for your monthly Shoeboxed subscription, it's easy to update your card on file anytime.
Here's how:
- Log into your account and click the name icon on top and choose Settings.
- Click My Billing Information.
- Enter your new information and click Update.

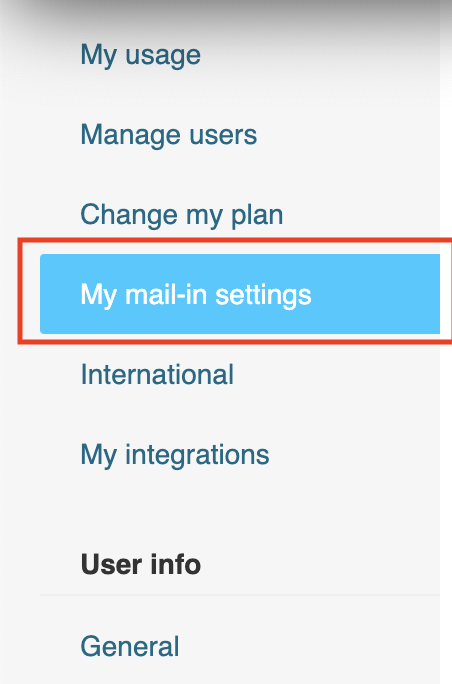
How do I update my mailing address?
If you've moved or wish to receive Magic Envelopes at a different address, you can easily update your mailing address for all future shipments.
Here's how:
Log into your account and select settings in the top right corner.

Click My mail-in settings.
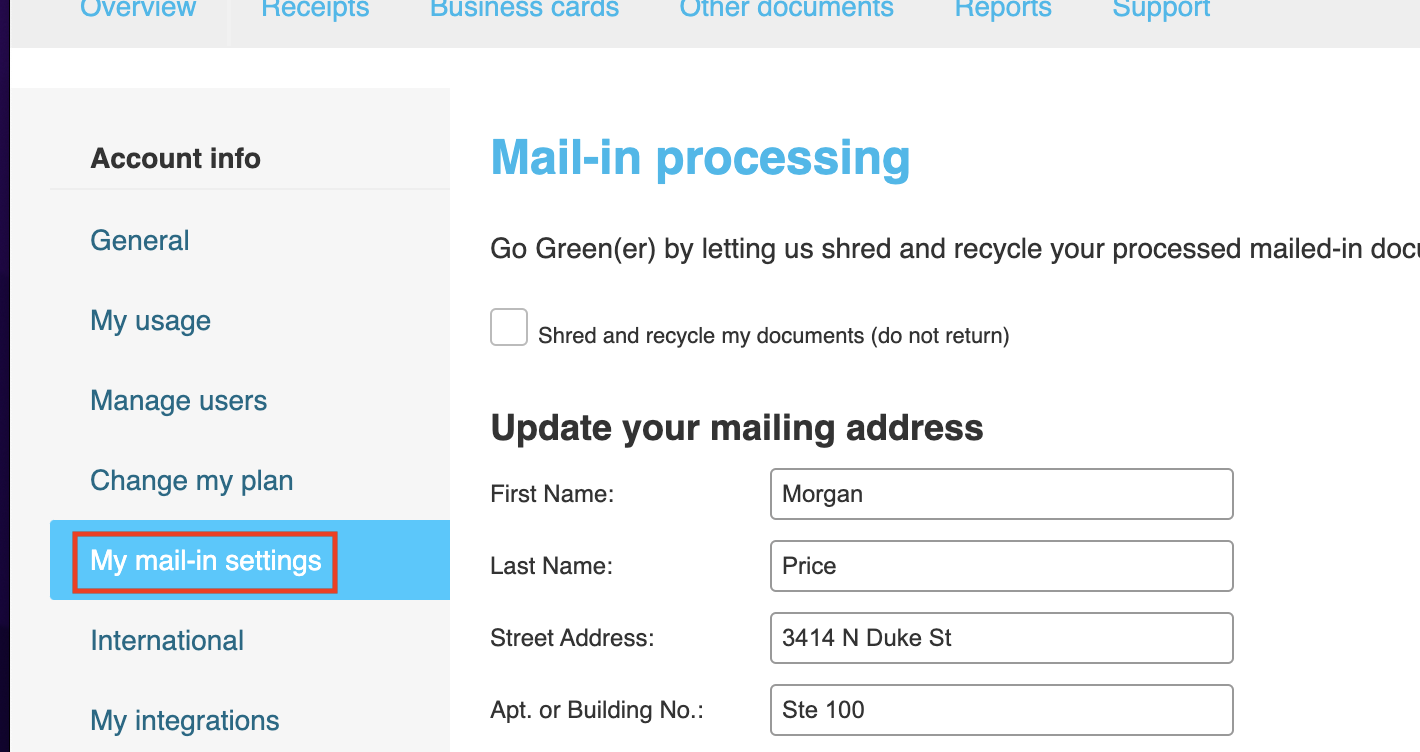
Enter your new information and click Save.

Email Notifications
Shoeboxed offers its customers the ability to set their preferences for email notifications.
If you no longer wish to receive emails from Shoeboxed, you can unsubscribe by clicking the Unsubscribe link in the footer of each email. This will lead you to a preferences page that will let you opt-out completely.
How much does Shoeboxed cost?
It all depends on what plan you choose! You can find pricing information for our different plans here.
Want to upgrade your current account? Not a problem, please log into your account, click settings in the top right corner.

Then select Change my plan.
Don’t see the option to change your plan? Contact support at [email protected].
Questions? Set up a consultation.

How do I refer a friend to Shoeboxed?
Do you love us as much as we love you? If so, we want you to help us expand the Shoeboxed community by referring your friends - you'll even earn a discount on your plan for doing so!
Here's how:
- Click the link at the bottom of your Shoeboxed page after logging in.

- Submit the brief application to join our referral program.
- Get your referral link and share it with anyone that can benefit from Shoeboxed.
- Earn 10% of fees collected for an entire year.

You will receive 10% commission of all referrals that sign up from your link! This reward is valid for one year.
However, it is important to note that if your friend cancels their Shoeboxed subscription, the referral reward will no longer be valid.
If you have any other questions about the customer referral program, don't hesitate to contact us.
Ask us ([email protected]) about our special bookkeeper and accountant
referral program! Or check out our page “What is the Shoeboxed affiliate program?”

Envelopes
Sending in your first envelope to Shoeboxed.
Shoeboxed Magic Envelopes
If you signed up for a Shoeboxed plan on our website, a magic envelope will be automatically sent to the address on the account after you complete the sign up. Please note that we are only able to send envelopes to one address per account, and our Magic Envelopes are not available to users located outside of the US or Australia. Your first envelopes may take a week or more to arrive, so please be patient! All envelopes are sent from our office in Durham, NC.
Our Magic Envelopes include free shipping both ways, so you don't have to worry about paying for postage. Each envelope contains a unique code that identifies which account an envelope belongs to, so you don't need to include a cover sheet or any identifying information in your envelope.
Sending Documents to Shoeboxed Using Your Own Mailing Materials
At this time our Magic Envelopes are not available outside the US and Australia, so you will need to use your own mailing materials to send your documents to Shoeboxed. You will also need to include a cover sheet that contains your name and Shoeboxed username or email address so we know which account the envelope belongs to.
You can print a ready-made cover sheet in your Shoeboxed account by clicking on View envelopes on your Overview Page.

Then clicking Print CoverSheet.
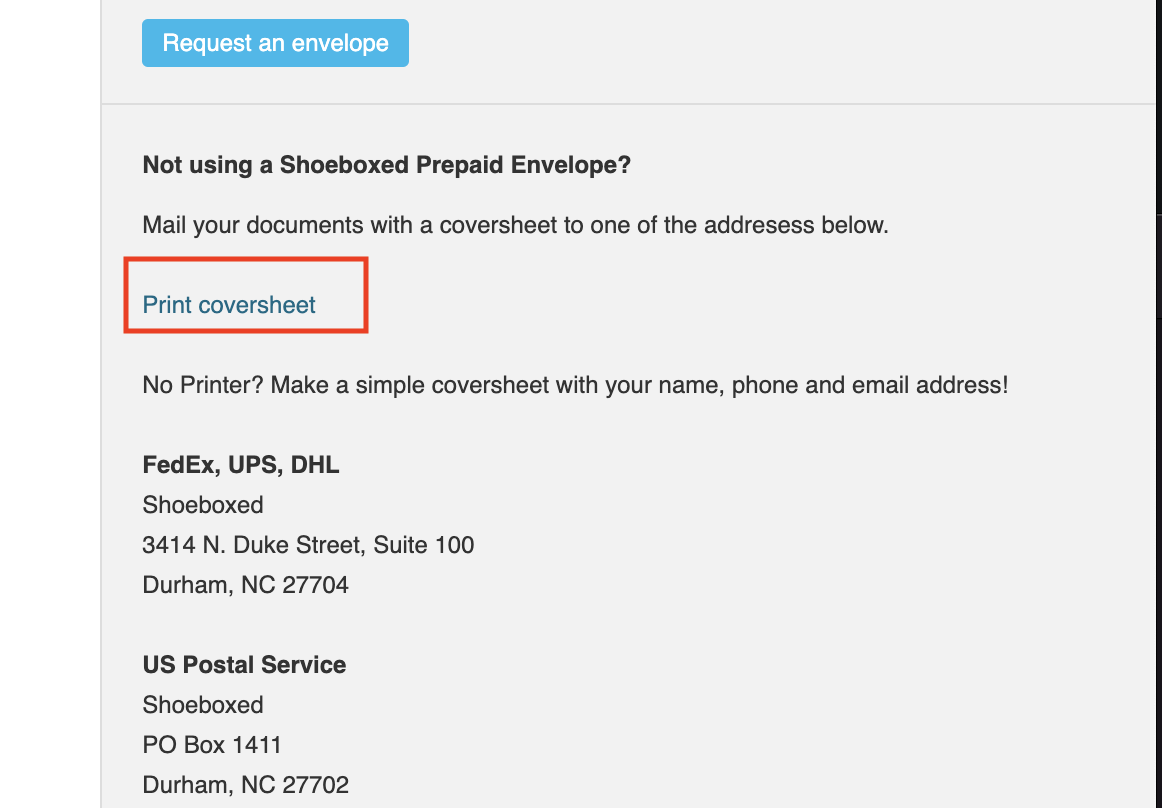
Here are the addresses to send to:
For the US Postal Service:
Shoeboxed
PO Box 1411
Durham, NC 27702
For FedEx or UPS:
3414 North Duke Street
Suite 100
Durham, NC 27704
Organizing or Sorting Documents Before Sending to Shoeboxed
For the most part, documents do not need to be organized in any way before you send them to Shoeboxed. Please make sure that documents are not attached to larger pieces of paper, as we are not able to process this kind of document. Each receipt should be loose in the envelope. Each individual document should also not be stapled or otherwise attached to other pages, unless the document is part of a multi-page document. You can read more about multi-page documents here.
All documents will go through the same processing here at Shoeboxed, so pre-categorization or sorting your documents will not affect how they are processed and added to your account.
However, our policy is to return documents to you the way that you send them to us. So if you send receipts pre-sorted or labeled in folders, subdividers or small envelopes, we will return them to you that way.

How are my documents processed at Shoeboxed? What information is extracted from receipts and business cards?
When we receive your documents, we process them with scanners that crop and enhance the scanned images automatically.
Receipts
The images of your receipts will be added to your account along with the information we extract from them, including:
- Store/Vendor name
- Date
- Total amount
- Payment type
- Last 4 digits of the card used (if applicable)
- Category (if recognizable).
Read more about categories here.
Business Cards
The images of your business cards will be added to your account along with the information we extract from them, including:
- Name
- Company
- Email Address,
- Phone number(s)
Notably, we do not extract job titles, website URLs, street addresses, fax numbers or Twitter handles.
Our business card scanning process can pick up information from non-traditional business cards with vertical or diagonal type, image-text or extensive color. After we extract data from your cards via OCR software, Shoeboxed data entry operators will make sure that your information is being entered correctly into your account. This ensures that the information is as accurate as possible and that you won’t have to type in any of the information from your business cards yourself.

Can I pre-sort or pre-categorize my documents before sending them in?
For the most part, documents do not need to be organized in any way before you send them to Shoeboxed. Please make sure that documents are not attached to larger pieces of paper, as we are not able to process this kind of document. Each receipt should be loose in the envelope. Each individual document should also not be stapled or otherwise attached to other pages, unless the document is part of a multi-page document. You can read more about multi-page documents here.
All documents will go through the same processing here at Shoeboxed, so pre-categorization or sorting your documents will not affect how they are processed and added to your account.
However, our policy is to return documents to you the way that you send them to us. So if you send receipts pre-sorted or labeled in folders, subdividers or small envelopes, we will return them to you that way.
Can I send multiple envelopes within one larger package?
You can, but each individual envelope will not be broken out into separate envelopes for processing. If you send us a package with multiple envelopes in it, all contents will be processed as one big batch (not multiple smaller batches). If you need a few smaller envelopes to be processed separately, they must be sent to Shoeboxed completely separately to be checked into our processing system separately.

Can you process my documents if they are stapled or taped to a larger piece of paper?
Please make sure that documents are not attached to larger pieces of paper, as we are not able to process this kind of document. Each receipt should be loose in the envelope. Each individual document should also not be stapled or otherwise attached to other pages, unless the document is part of a multi-page document. You can read more about multi-page documents here.
If you are sending in multi-page documents, please make sure they are in the order you want them scanned and clip or staple them together in that order. We prefer staples, as paper clips can detach through the mail, but we can accept either.

Does Shoeboxed process documents besides receipts and business cards?
Yes! Shoeboxed will scan essentially any paper document (within reason). Documents that are not receipts or business cards will undergo scanning, OCR (optical character recognition) and archiving by date and title in the Other Documents folder of your Shoeboxed account.
Restrictions
We cannot process documents wider than a normal sheet of paper or longer than 3 feet. If you send us something that is impossible for us to process, it will be marked as such and returned to you. Please review our Terms of Service for more details.

How big are Magic Envelopes and how much can I send in them?
Our Magic Envelopes are large 9″x12″ Tyvek envelopes. Tyvek is a very sturdy and reliable material, so our Magic Envelopes can usually hold hundreds of receipts depending on the receipt size. However, if you find that your receipts do not fit we can send you more!

How do I request more Magic Envelopes?
If you lose your Magic Envelope or need additional envelopes, you can request two envelopes per week from your online account.
Here's how to get more Magic Envelopes:
Log into your account, and on the Overview Page click the View envelopes button.

In the top right box, click the Request envelopes button.
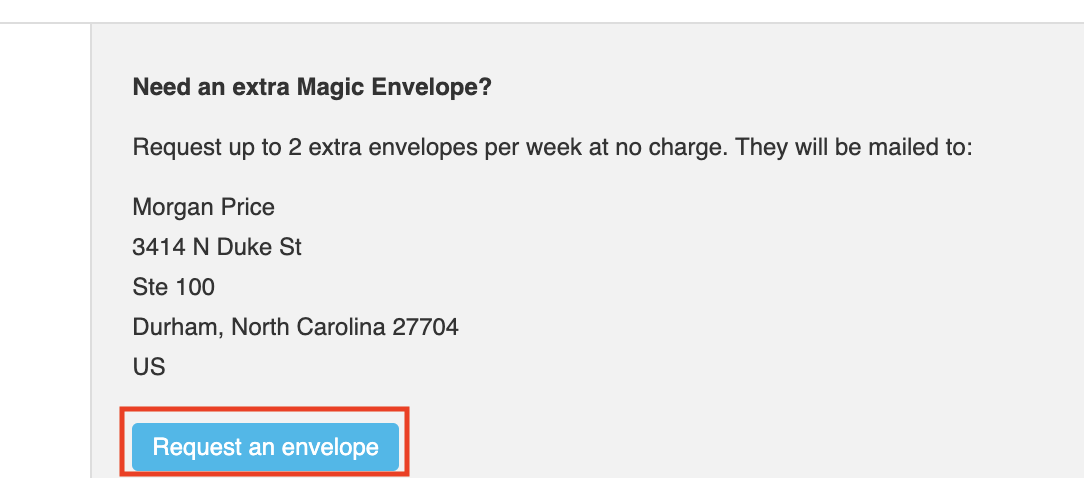
Those envelopes will be sent out on the next business day.
The button will allow you to request up to two additional envelopes per week. If the Request Envelopes tool is not working properly it may be because you are located out of the US or Australia, are on a Lite plan, or because two envelopes have already been sent to you this week.
If you are a new user, two envelopes were sent to you automatically, so the button will not work. Check back in a week and you can request two additional envelopes if you need them, or if you need more immediately, please contact our support team at [email protected].

How does Shoeboxed process multi-page and double-sided documents?
Mail-In Documents: Double-Sided
Double-sided documents that contain printed information on both sides will be automatically processed as a single document entry in your account.
Mail-In Documents: Multi-Page
All you have to do is put a paper clip on receipts or documents that have multiple pages, and we will scan them as one document with multiple pages. Multipage documents only count once toward your monthly limit-- not once for every page.
While there is no set page limit on what can count as a single document, this is within reason. For example, we will gladly process a 3-page invoice or a 8-page lease as a single document, but we will not be able to count documents that are tens or hundreds of pages long as a single scan.
Also, multi-page documents must actually be pages of the same document (from the same purchase, on the same day, with the same information, etc.). This means that 30 different receipts from the same store will be processed as 30 documents toward your monthly limit, not as a single entry in your account. If you have a question about a multi-page document before sending it in, send us an email at [email protected] and we'll be happy to clarify.
Digital Documents
For digital submissions, make sure to submit the multi-page document in a single file. In digital submissions, there is a size limit, so please note that our system cannot handle documents that have a very large number of pages.

How long will it take for my documents to be processed? Can I expedite the processing of my documents?
Shoeboxed processing varies by submission method and plan level.
Documents submitted digitally (email, upload or mobile apps) will be processed within 24 hours (but usually much faster).
Documents submitted via regular mail vary by plan.
Lite: 3-5 business days
Classic: 2-3 business days
Business: 1-2 business days
If you received notification that your envelope was received by Shoeboxed more than 5 days ago and your envelope has not been processed, please contact our support team at [email protected].
Expediting Processing by Mailing Method
The easiest way to speed-up your processing is to send receipts, business cards, and other documents using FedEx, UPS for US or Express Post for Australia or another fast carrier, since the longest part of processing is the mail. Make sure to include a cover sheet with your name and Shoeboxed username or email address inside your envelope so that we can easily identify the package. Magic Envelopes do not require you to further identify yourself, as they are all embedded with unique tracking codes that associate them with your account automatically. You are welcome to use your own packaging and postage any time. You are responsible for any shipping expenses incurred outside of our postage paid basic envelopes.
I travel a lot and won't receive Magic Envelopes at my home address.
If you don’t have one of our Magic Envelopes readily available, just send your documents to us in any packaging that you prefer, just make sure to include a cover sheet with your name and email address so we know which account it belongs to. If you travel frequently, we can send you a handful of Magic Envelopes to travel with so that you can send them in from anywhere in the US. If you’re outside the US just mail documents to us in any packaging that you prefer.
Here are the addresses to send to:
For the US Postal Service:
Shoeboxed
PO Box 1411
Durham, NC 27702
For FedEx or UPS:
3414 North Duke Street
Suite 100
Durham, NC 27704

What are envelope codes? Can I name my envelopes?
Envelope codes are assigned to envelopes either when we receive them, or pre-assigned on our Magic Envelopes before we send them out to you. This code enables Shoeboxed to identify which envelopes belong to which users and to know with 100% certainty where an envelope is located in our operations facility for the duration of its processing.
Each Magic Envelope has a unique envelope code. Before a Magic Envelope is sent to you, we associate its envelope code with your account, and then we wait for that envelope to come back. When we receive it, we know it belongs to you.
For Lite users and people sending in receipts and business cards in their own envelopes, you will need to include a cover sheet (containing your name and e-mail) with your envelope so that we can identify its owner. Then we assign an envelope code to your envelope once it arrives.
At this time, envelope codes are not customizable and cannot be changed.

What kind of scanner is used to scan my documents?
We use state-of-the-art scanners to ensure that your document images are as clear and legible as possible.
What Sets Our Scanners Apart
- Advanced clarity features that make even "unreadable" images legible.
- Automatic image orientation adjusts skewed images, even completely rotating upside down ones, so all captured images are oriented in the same direction.
- Correctly identifies and retains color when it is integral to a document (e.g., logo, photo, date stamp) and eliminates it when it is not (e.g., colored paper stock).
- Laser recognition of paper width in the feed tray to ensure that all receipts are scanned one at a time.
- Capability to scan extra-long receipts. Standard desktop and portable scanners are usually limited to paper under 14 inches in length. We can process receipts that are up to 3 feet long.

Where should I send my documents to be processed? (US and International Customers)
If you signed up for a Lite plan or are sending documents in something that is not a Magic Envelope, all you need to do is address it to Shoeboxed and include a cover sheet with your first and last name and your Shoeboxed username or email address.
You can find our mailing addresses on this page along with a button to print a ready-to-use cover sheet by clicking here.
For the US Postal Service:
Shoeboxed
PO Box 1411
Durham, NC 27702
For FedEx or UPS:
3414 North Duke Street
Suite 100
Durham, NC 27704

Will my documents be returned to me?
Document Return
If you are signed up for a Shoeboxed Startup, Professional or Business plan, your receipts and business cards are mailed back to you by default. We will also include a fresh Magic Envelope with the return envelope for you to send in your next shipment of documents!
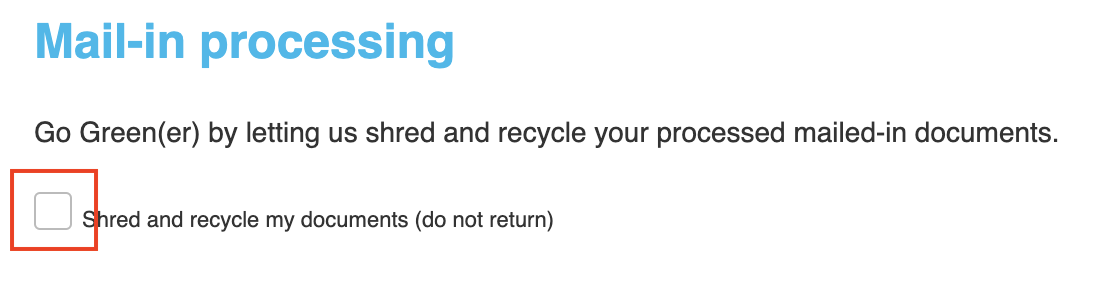
Return and Green(er) Shred and Recycle Program
If you are a Startup, Professional or Business plan user and do not want your documents returned, you can choose to enable the shred and recycle option in your account.
Here’s How:
- Open your Accounts settings

- Select My mail-in settings
- check the box Shred and recycle my documents.
Mobile Apps
How to use the Shoeboxed Mobile App
Add a document by clicking the "+" button in the middle of the navigation bar. You can choose to take a photo or upload one from your photo library from here.

Pending documents will be listed at the top of your receipts feed as "Processing".
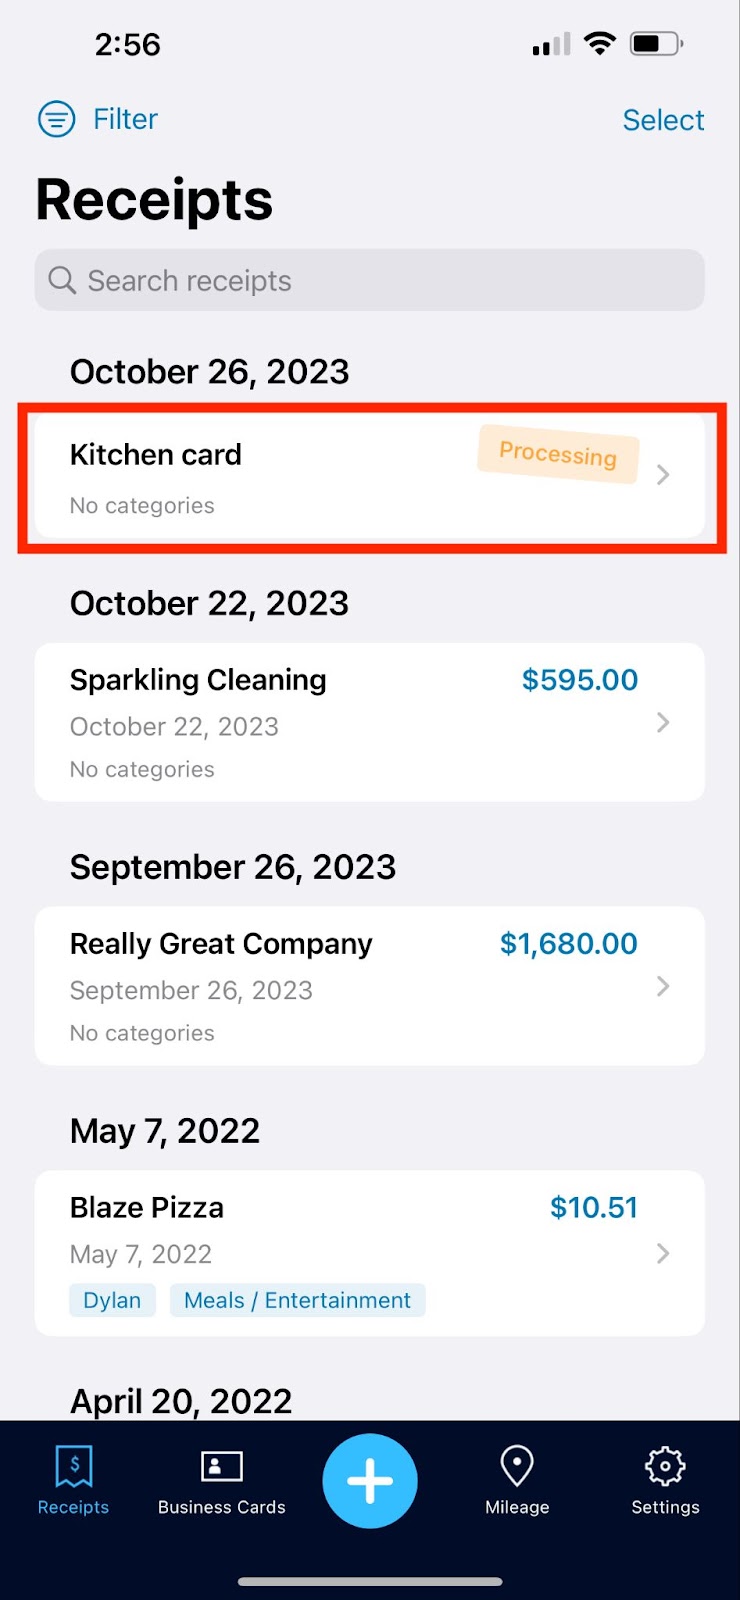
View all of your receipts or business cards by clicking their label on the navigation bar.

To filter your receipts based on category or reimbursement status, click the round filter button to the right of the search bar.

How to Edit A Receipt
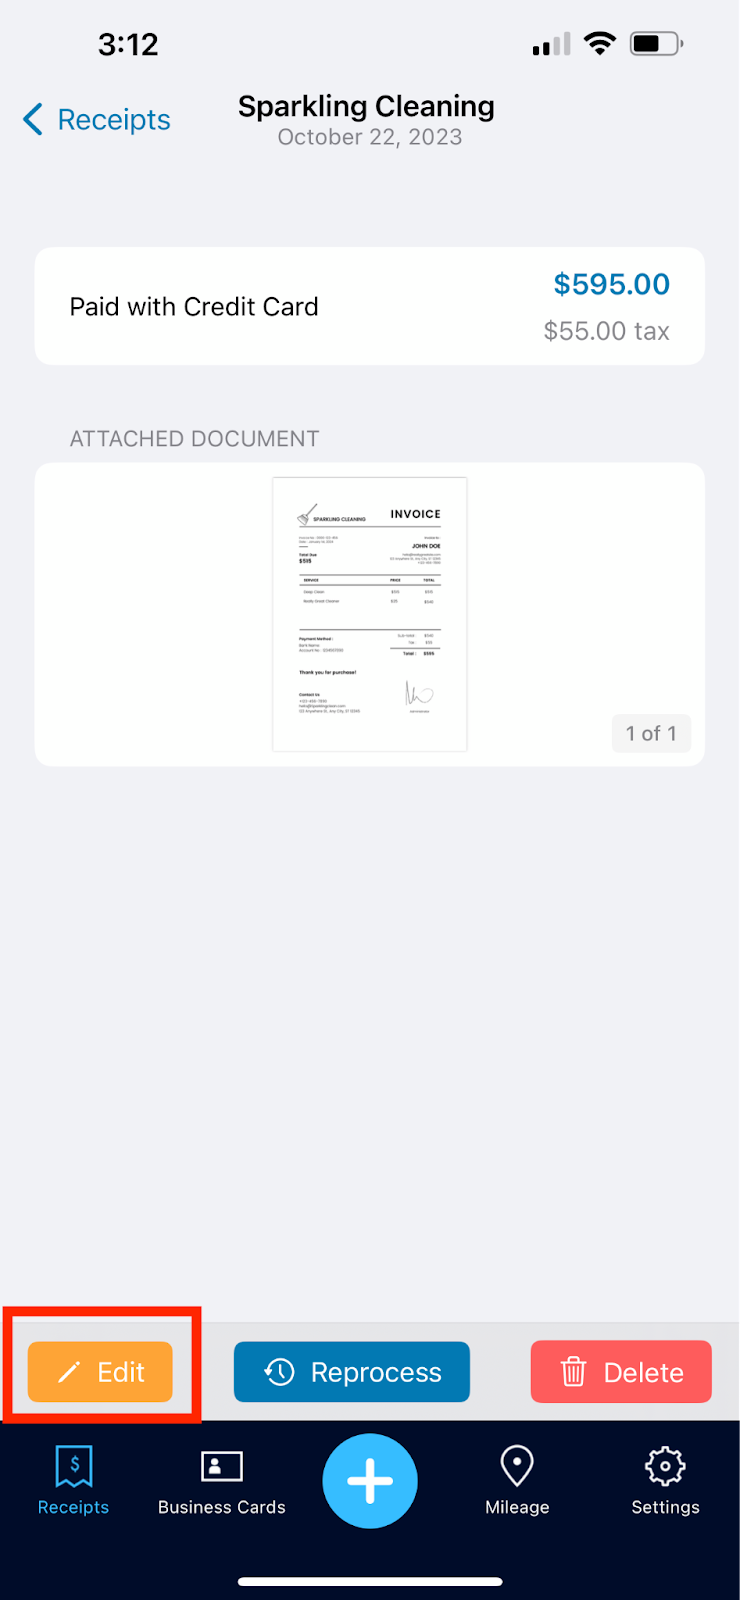
Select a processed receipt or a receipt in processing and select Cancel Processing in the upper right-hand corner. From there, click the Edit button in the same corner.
Here you can edit the document yourself. You can edit the vendor, total amount, tax amount, payment method, date and categories. Be sure to click save after making any changes.
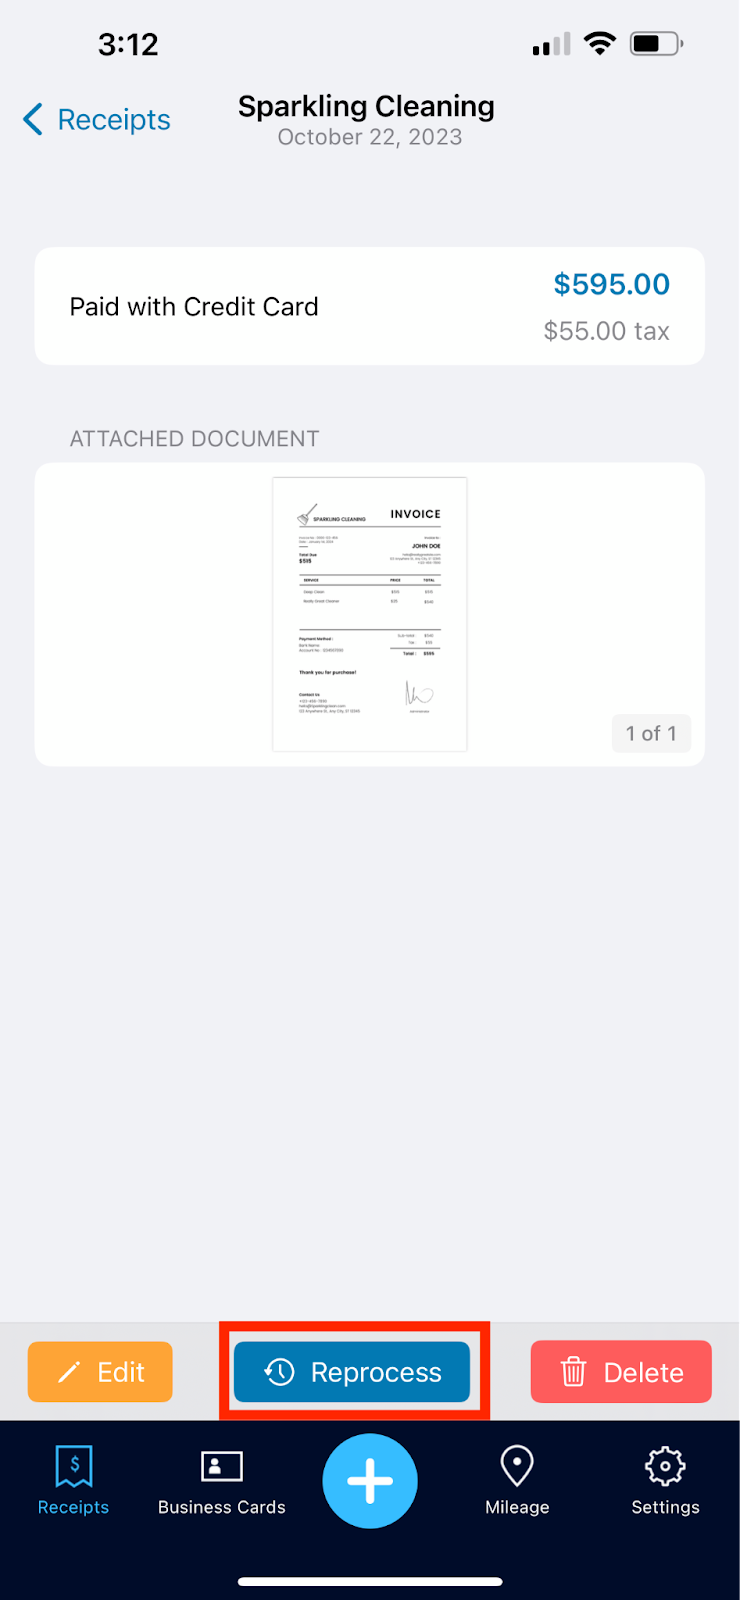
You can also Re-process the document and send it back through data entry.
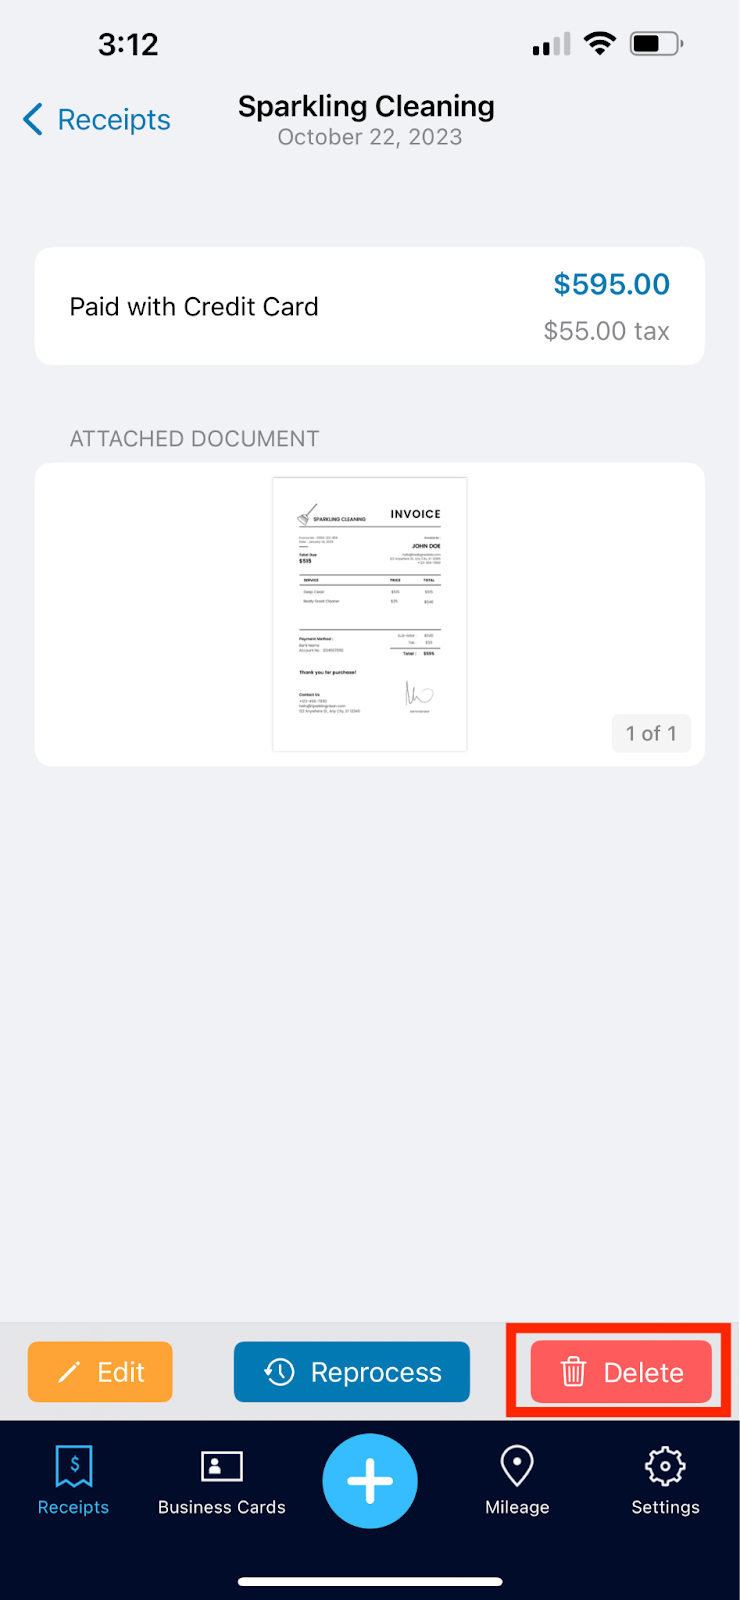
Delete the document by clicking the delete receipt link at the bottom.
You can also swipe left on a specific receipt and choose to edit the data, process the data automatically, or delete the receipt.


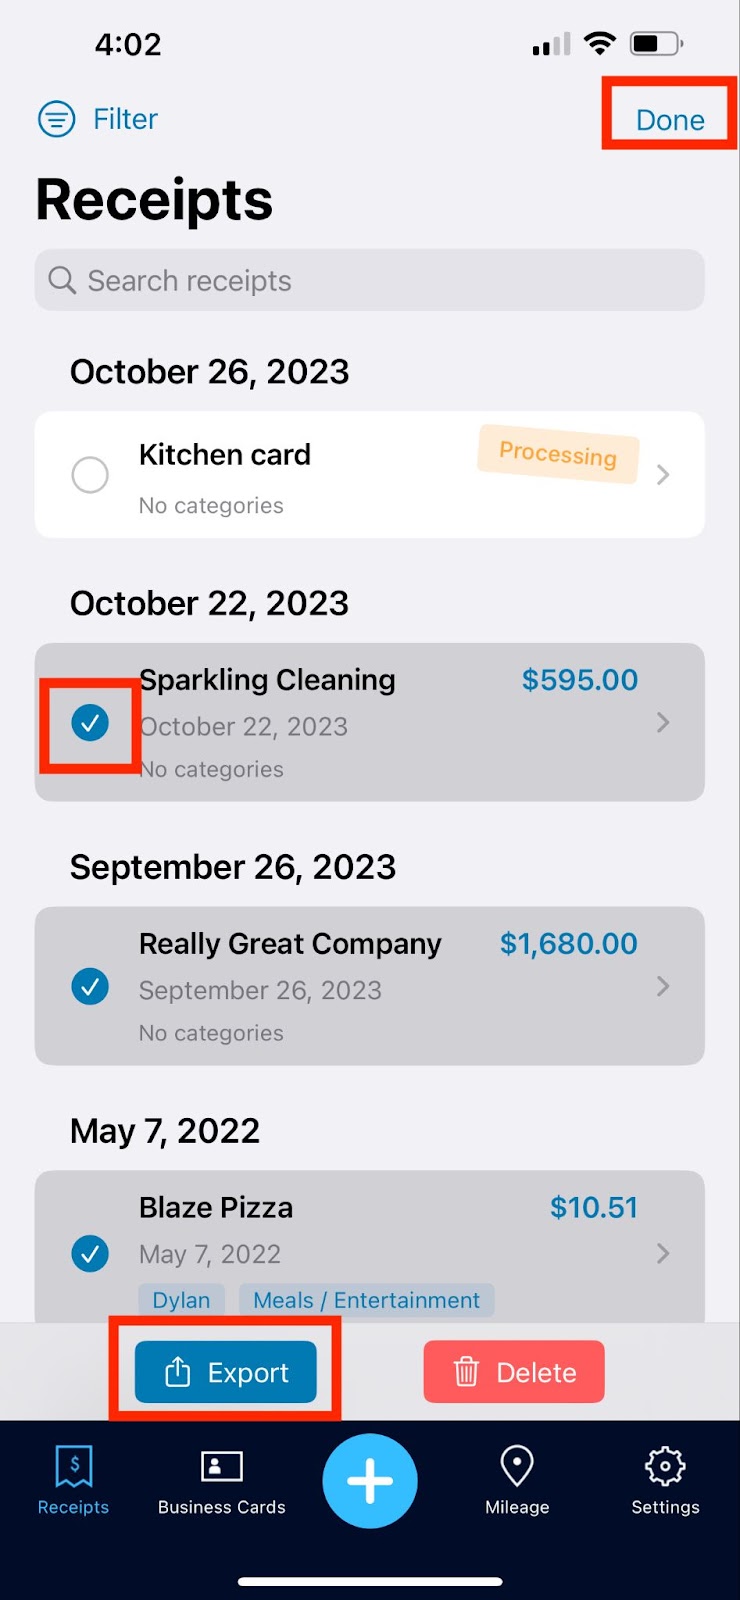
Running a Report
In order to generate an expense report, click Select at the top of the receipt section and select the receipts you want to export. From there, click Export and your report will be generated in your email and is ready to send!

How to use the Shoeboxed Mileage Tracker
The Shoeboxed Mileage Tracker is available on both the iPhone and Android App.
How to use it:
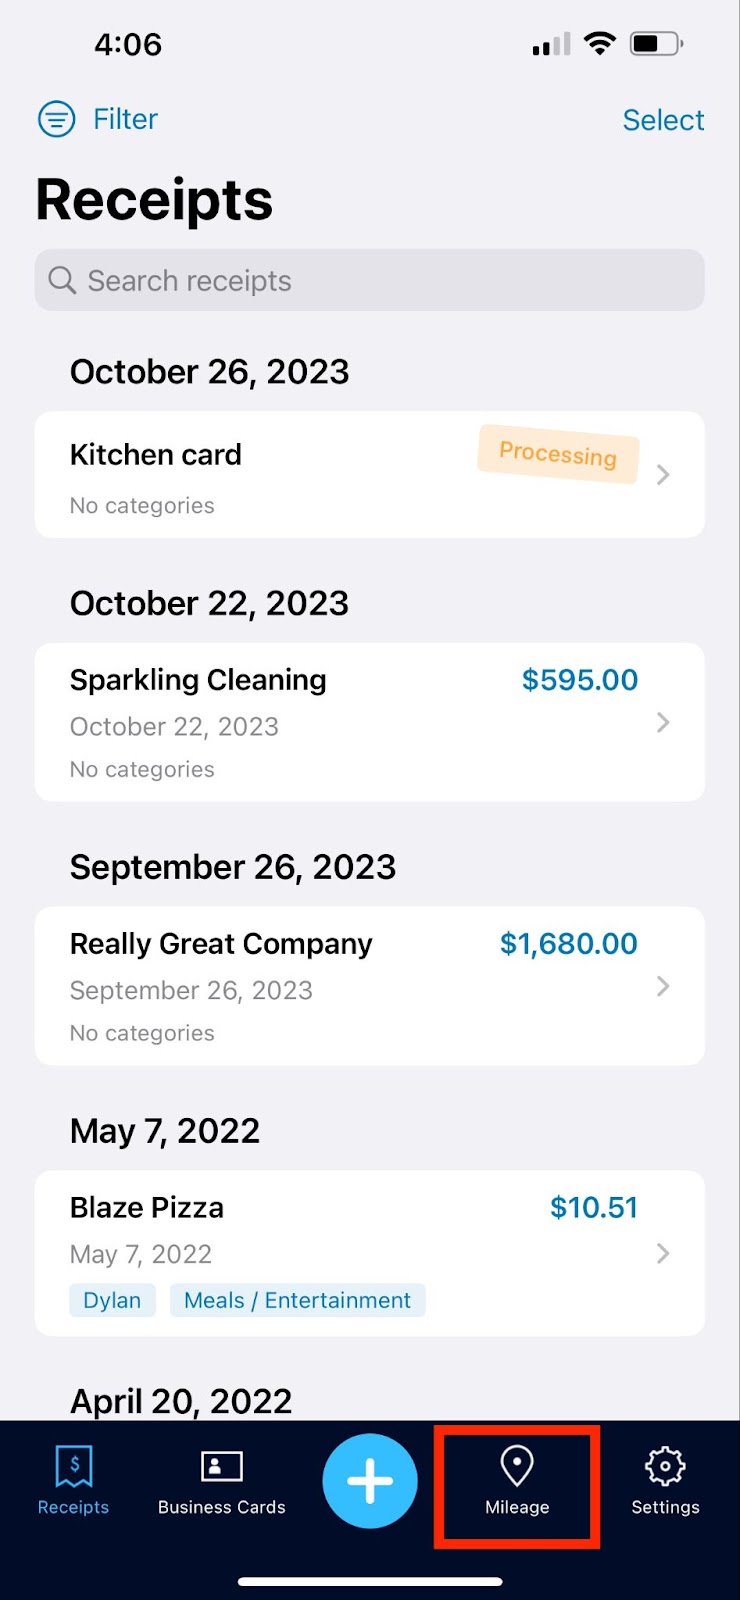
Select Mileage in the bottom navigation bar.
Select Start Mileage Tracking to begin tracking your trip.
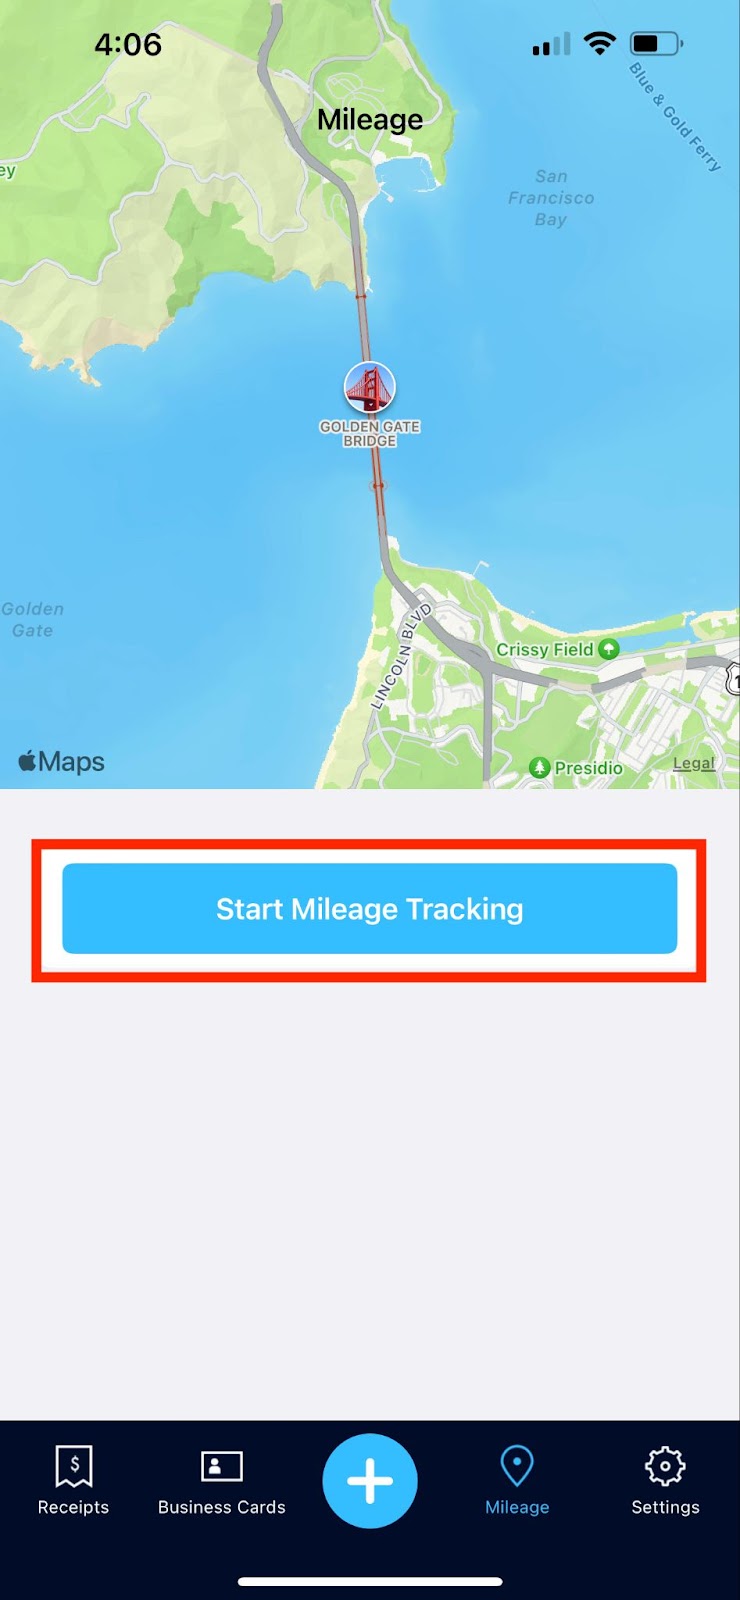
Drop a pin to log the point where you would like to start tracking mileage. To ensure accuracy, drop separate pins at different locations if you are making multiple stops on a single trip.
4. Hit End Mileage Tracking as soon as you’re ready to stop and your mileage will be calculated using the standard mileage rate and it will appear in your receipts section!
5. Enter in the details and Save!
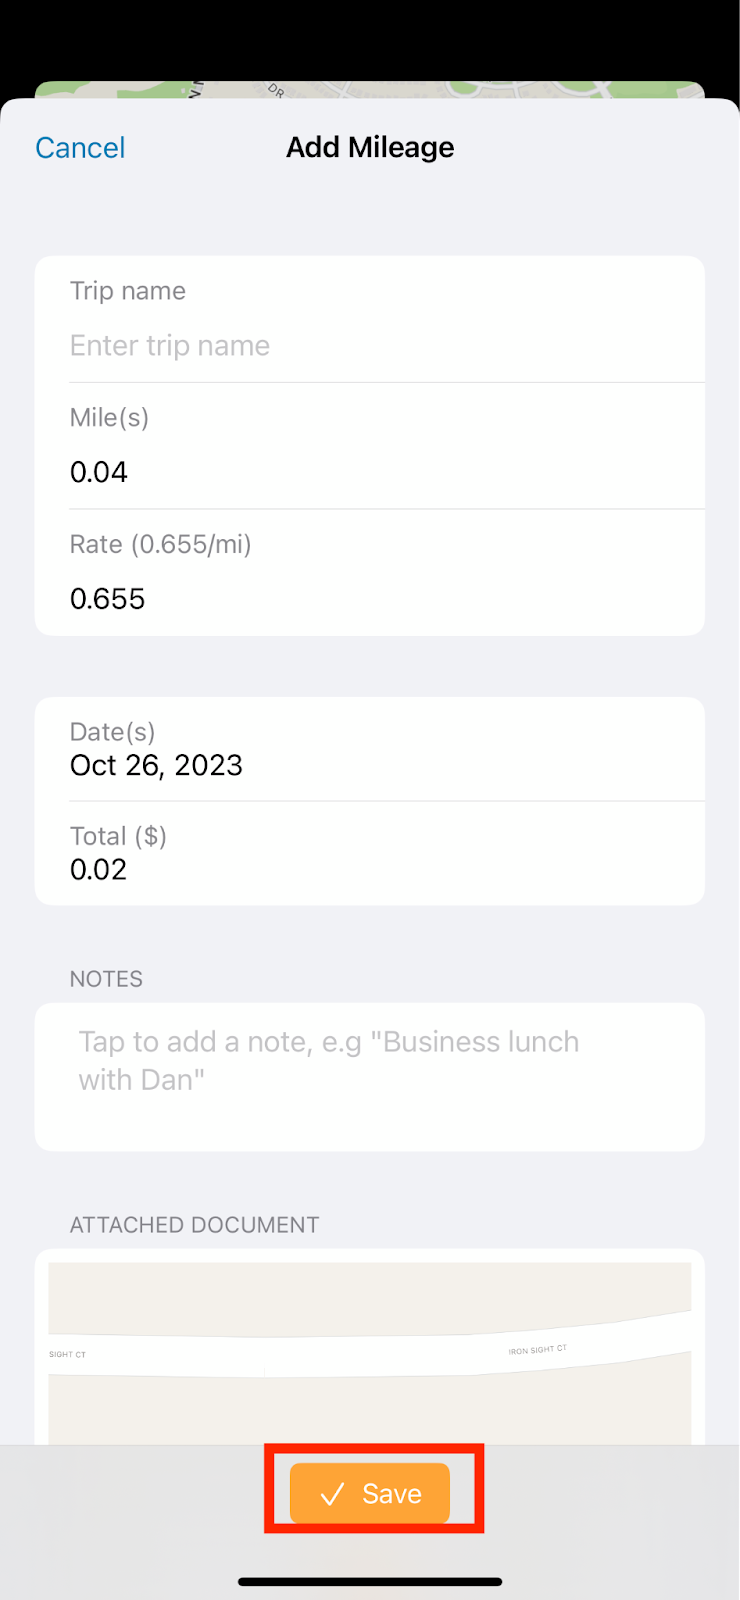
It's that simple, now get out there and start tracking!
Note: That the continued use of GPS can affect the battery life of your mobile device.

How long does it take to process receipts on the iPhone and Android apps?
When you submit a receipt via the iPhone or Android app, it will take no longer than 1 business day to process. Typically, it will take a much shorter time, ranging from a few minutes up to a few hours depending on when you submit the receipt.
If you have receipts in your app that have been processing for longer than 1 business day, then there was a problem with the submission and the image never made it into our processing queue. Please contact our support team for assistance at [email protected].

Integrations
How do I integrate with QuickBooks Online?
Integration with QuickBooks Online (Intuit) consists of the followings steps:
Go to your receipts tab and click on (Export All) button and choose (QuickBooks Online)

Then put in your QBO details to authenticate.

And authorize the connection.

Export your receipts to QuickBooks Online and categorize them during the process.
Click on Export All or if you want to export specific documents check the check box to select each item and select Export Selected under the receipts tab. Then choose QuickBooks Online.

Here you can link payment types to a specific account so that they will auto-fill for you.
.jpeg")
Next you will see your receipts grouped by vendor name. Link each one to the correct Expense Account from QuickBooks. Categories assigned within the Shoeboxed account have no impact on the export process. Receipts must be categorized during the export regardless of whether they have a Shoeboxed category assigned or not.
Note: you'll only have to do this once for every vendor as the system will set a rule for future receipts with the same vendor name to be allocated to that particular account!
.jpeg")
Click the Export all to QuickBooks and you're done! Your receipts will be automatically sent to QuickBooks as general journal entries.
.jpeg")
We will send an email when the export is complete. Shoeboxed exports will appear in Quickbooks Online under the Expenses tab.
Notes:
- The QuickBooks integration is only available in the United States.
- Receipt images are not exported. A link to the image is included in the "notes' field in QuickBooks Online.
- If the Credit account is a bank account, it goes into QB as a Check.
- If the Credit account is a Credit Card, it goes into QB as a Credit Card Expense. Otherwise, it goes in as a Journal Entry
How do I integrate my Shoeboxed and Xero accounts?
Before you start it is a good idea to remove the default Shoeboxed set categories first.
Here’s How:
- Click on your name icon
- Choose Account Settings
- Choose International
- Then untick Show Australian Tax Categories and hit save

Xero is an online accounting system based in New Zealand.
Your Shoeboxed account directly integrates with Xero. Want to connect the two?
Instructions for Shoeboxed's Direct Integration with Xero
By default you will be able to export your documents as draft bills, but you will have the option to choose to export as approved bills.
Please note that your Xero user needs Xero Standard privileges with Non Cash Coding and No Reports, as a minimum Xero privileges required for the integration.
Xero integration requires 3 main steps:
- Importing Your Xero Chart of Accounts.
- Categorizing your receipts.
- Exporting Receipts.
Importing Your Xero Chart of Accounts:
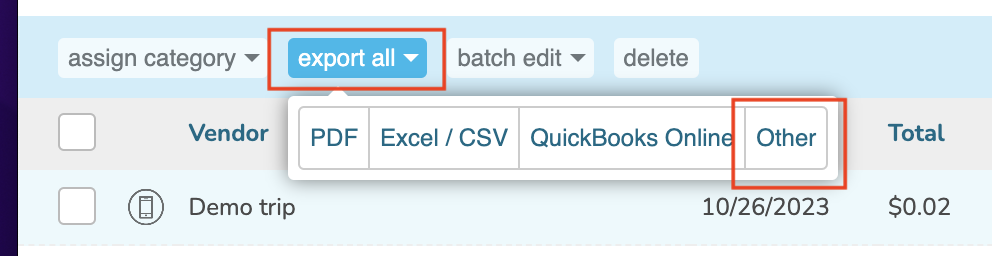
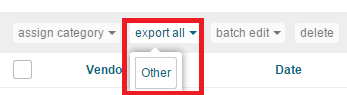
Select Export All from the Receipts tab then choose Other.
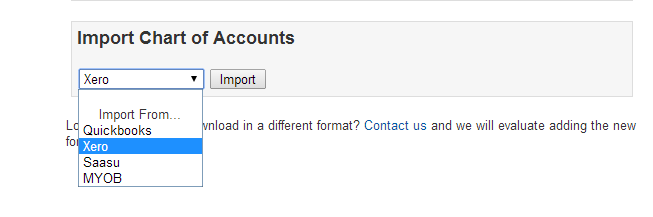
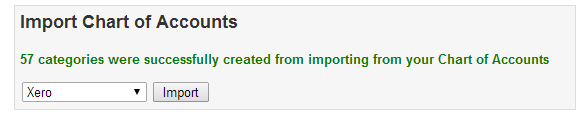
From the Shoeboxed Export Expense page Scroll down to the Import Chart of Accounts option. Choose Xero from the drop down button and then click Import.
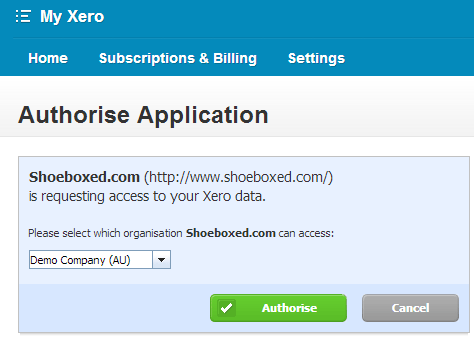
You will be prompted to authenticate with your Xero account.
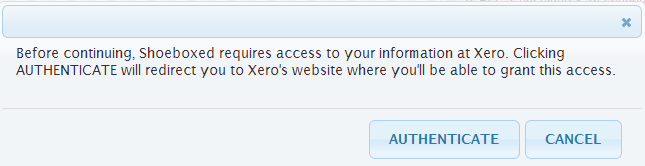
Once you have entered your credentials you will be able to choose a respective Xero account.
Once done you will see the number of account categories that are successfully imported.
Note: Shoeboxed will not import any accounts that don't have a corresponding Account Code.
2. Categorizing your Receipts.
Go to your receipts tab and then start categorizing your receipts using the Xero chart of accounts category (you will notice that there's the word "Xero" in front).
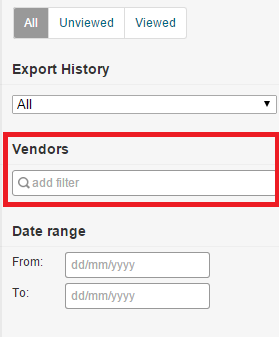
You can use the Vendors filter to select vendors that belong to the same category and make sure that all items are displayed. Select all by ticking the checkbox on the top left hand side and assign a particular category.
While you are categorizing your documents, you will notice a pop up box asking you if you would like to create rules for future receipts with the same vendors to be allocated the same particular category.
Exporting Receipts as draft bills:
Select Export All and choose Other under the receipts tab.
Alternatively you can select the individual receipts you want exported and choose the Export Selected button.

Either option will take you to the Export Expenses page. Then select Send to Xero.

By default the option “Don't export receipts that have been exported to Xero” is chosen where the system will pick only documents that haven't been exported.
If you want to export receipts that were previously exported, please use the Export all selected receipts option.
If you want to export within a date range, you can use the Date Range feature in the “Export Expenses” page itself.

Note: The Date Range is based on the date of issue of the receipt
You can either use the Send to Xero button but we recommend using the Verify & send to Xero. The verification page provides an easy way to check and recode your receipts or add any missing codes before exporting.

Click on Continue.
If you click Send to Xero, you will skip the verification stage. Otherwise, you will be taken to this screen where you can add categories or modify them.

During the verification process, if you notice any yellow flag you can safely ignore them as they are only for information about the gst, but if there's a red flag this means that the GST amount is more than 10%. Please use the (Calc GST) button to correct it before exporting as Xero doesn't allow any items with GST higher than 10%.
Click the Finish Export button where you will be taken back to the export screen with a summary of how many receipts were successfully exported.

By default, your receipts will be exported as Draft bills.
You can access draft bills either from the “Invoices Owed to you” section from the Xero dashboard or from the menu bar (Accounts>>Purchases>>Bills).


Export to Xero as Approved bills

During the process of exporting to Xero, please tick the check box of (Send to Xero as Approved invoices).
Note that to export as approved bills it is mandatory to have a Xero category for all your receipts. Keep in mind the (Verify & Send to Xero) process where you can quickly categorize your receipts if it's missing.
If you find this article helpful please select "Helpful" below :)

How do I integrate my Shoeboxed and Dropbox accounts?
You can quickly and easily export your receipts, business cards & more from your Shoeboxed account to Dropbox.
Here's how:
First, you need to associate your Dropbox account with your Shoeboxed account. Click on the user icon in the top right corner of your Shoeboxed account, choose settings then My integrations.
On that page, under Dropbox, click Grant permission and then you'll be asked to authenticate with Dropbox. Don't worry, we never see or store your Dropbox credentials.
Once that's done, Dropbox will now appear as an export destination in your documents table, just like your other existing export methods.

How do I integrate my Shoeboxed and Wave Accounting accounts?
Wave Accounting is the fast, easy, 100% free accounting app for small businesses. Look below to learn how to integrate your Shoeboxed account to have your receipts appear automatically in Wave Accounting.
Here's how:
Sign in to Wave Accounting and click Integrations on the left side of the page underneath settings.

Select Shoeboxed (located under Integrations) and click Connect.
You will be taken to Shoeboxed.com, where you'll need to enter your Shoeboxed username and password and select the box next to Allow Shoeboxed to transfer data to Wave Accounting. Then click Authorize App.

You'll be taken back to Wave to choose the business your Shoeboxed account will import into. Use the drop-down menu to make your selection.

Each category in Shoeboxed can be paired with a category in Wave so that each is imported into the right place. You can make your selections by matching the Shoeboxed categories on the left with your Wave Accounting Categories on the right.
If you have assigned more than one category to a receipt in Shoeboxed, Wave will use alphabetical order to determine which category will go into.
You also have the option of categorizing your transactions after they are imported into Wave. To do this, select the dashed line in the drop-down menu.
Each payment account in Shoeboxed also needs to be paired with a payment account in Wave. Make your selection by matching the Shoeboxed Payment Account with your Wave Accounting Payment Account on the right.

When you've mapped all of your accounts, click Save These Mappings.
Click on See Your Imported Transactions to continue to the Imported Transactions page. Any transactions that were categorized using the mapping process above will have an Approve button for you to click if you agree with the categorization. To change the categorization, select the transaction and click the correct Financial Category. Learn more about categorizing your transactions here.
You're done! All of your data from Shoeboxed will now be imported into Wave regularly.
How do I export my receipts into FreshBooks?
FreshBooks is a powerful cloud accounting tool for small businesses.
Want to export your Shoeboxed receipt data to FreshBooks?
Here's how:
Create a CSV file of the receipt data that you'd like to export.
Format the CSV file so that the columns appear in this order: Date, Vendor, Category, Notes, Amount.
Log into your FreshBooks account and click on Expenses.
Click File Import and select the CSV file.
Choose your other settings and click Upload File.
That's it! Your Shoeboxed receipt data is now in FreshBooks in the Expenses section. For additional assistance, click here for a support article from FreshBooks about importing expenses.
How do I export my receipts into GoDaddy Online Bookkeeping?
Syncing your scanned receipts from Shoeboxed directly into GoDaddy Online Bookkeeping is easy.
Here's how:
Log into your GoDaddy Online Bookkeeping account and click on Add Another Account on the left hand side.
Choose the Receipts button.
Follow the instructions given and then give Shoeboxed permission to send your receipts to GoDaddy by entering in your Shoeboxed username and password into the fields provided. You must also check the box below the form to allow the integration. The receipts will be sent over automatically and will update daily.
How do I integrate my Shoeboxed and Salesforce accounts?
Shoeboxed offers two options for you to send your business card contacts to Salesforce.
Using a CSV File
Download a CSV file of the contacts you want to export to Salesforce.
To import as Leads, go to the Leads tab in Salesforce and use the Import Wizard to import your contacts.
To import as Companies & Contacts, go to the Contacts tab in Salesforce and use the Import Wizard to import your contacts.
Using OneSaas
OneSaas allows you to automatically push your Shoeboxed contacts and sales leads into Salesforce. For instructions on how to integrate Shoeboxed with OneSaas, please click here.
How do I use my HP printer with Shoeboxed?
Use your HP printer or scanner to scan and organize documents in your secure Shoeboxed online account. You can find the Shoeboxed ePrint app here.
The Shoeboxed ePrint app is available on all HP Office, web-enabled printers.
For a full list, click here.
Please note that each document must be submitted as its own individual file to be processed properly by Shoeboxed. We cannot split files that contain multiple documents.
Expense Reports
How do I export my receipts into a CSV/Excel file?
In addition to just creating reports, CSV files are accepted by many programs and tools as a way to import information from your Shoeboxed account!
Note: A CSV file is one with Comma-Separated-Values. This is a common import file type to many accounting and financial software. When creating this export, select what character you would like to be placed between each value/column (delimiter). Then, when you go to import this, enter the same character as the delimiter and your software will automatically pull your information into proper rows and columns.
Here's how:
Log into your account and click on Receipts.

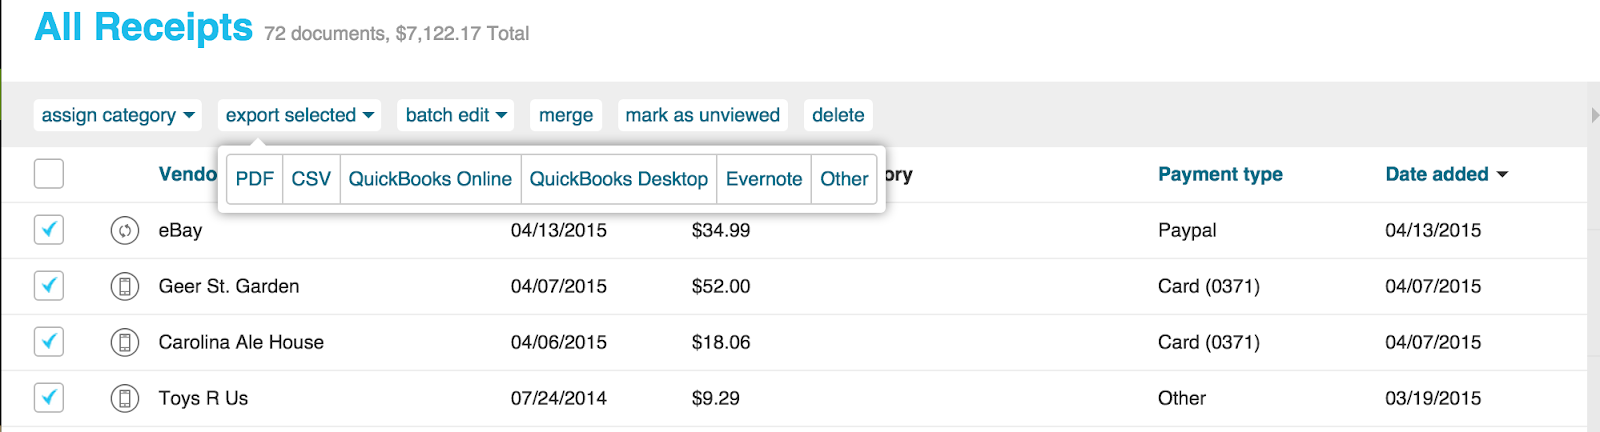
To export receipts, check the boxes next to the receipts you want to export, click the Choose Action drop-down menu and select Export Selected Receipts.
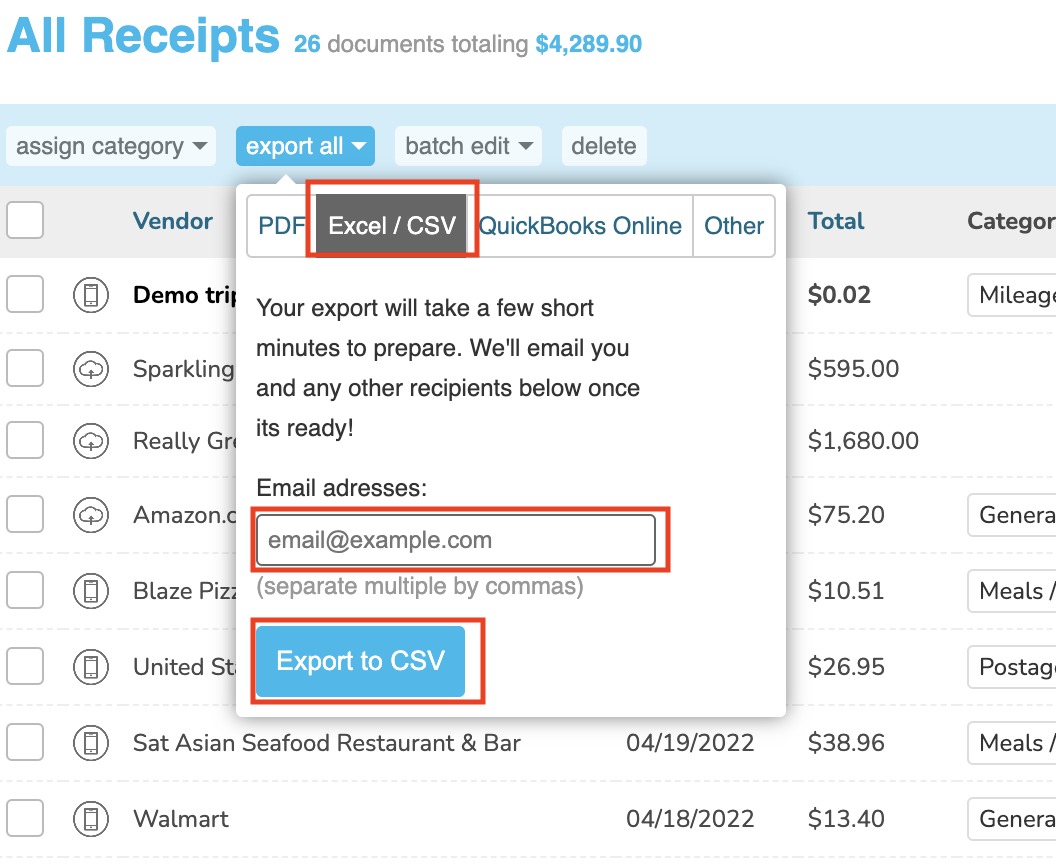
Then it will prompt you to enter your email address, the report will be run, and then sent to your email address.
How do I export my receipts into a PDF file?
You have two different options for exporting receipts as PDF files from Shoeboxed. Exporting an expense table of receipts, which includes an expense table as well as the original receipt image. Or exporting single receipts as PDFs.
Exporting an Expense Table of Receipts
Our PDF reports are great for expense reporting, as they include both a table of your data as well as the original images of your receipts. Want to create a PDF report from your Shoeboxed receipts?
Here's how:
Log into your account and click on Receipts.

You can then filter the receipts by using the filters on the right side of the page to specify exactly what you want exported.

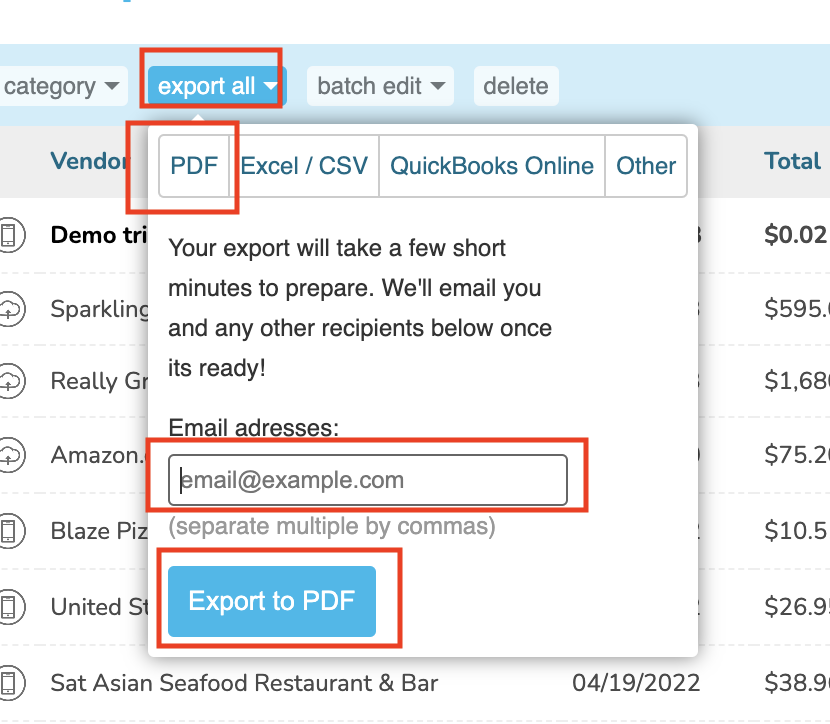
To create a report, simply select the checkboxes next to the receipts you want to export, then select Export and choose PDF.
Note: PDF exports must contain fewer than 450 receipts or the file will be too large to generate
Exporting a Single Receipt as a PDF
Here's how:
Log into your Shoeboxed account and click on Receipts.

Click on the receipt that you wish to export.
From the viewer, click on Download PDF in the lower right hand corner and it will start to download
How do I export to PDF, CSV and QuickBooks Online?
You can now export to CSV, PDF and Quickbooks Online from the main receipts table.
Note: PDF exports must contain fewer than 2000 receipts or the file will be too large to generate
Here's how:
Log into your account and click on Receipts.
To create a report containing all receipts, click on the first tick-box next to the Vendor column
Click on the link Select all 2054 documents that match this filter

To create a report containing only select receipts, use the filters as usual or simply select the checkboxes next to the receipts you want to export, then select export selected

Then choose the export type (PDF, CSV, QuickBooks Online) and follow the prompts
For more details check the export specific FAQs:
How do I export other documents as PDFs?
Want to export your other documents as PDFs?
Here's how:
Log into your account and click on Other Documents.
Click on the document that you wish to export.
cFrom the viewer, click on Download PDF. Your file will start to download soon after.
Business Cards
How do I create a CSV file of my business cards?
In addition to just creating reports, CSV files are accepted by many programs and tools as a way to import information from your Shoeboxed account. Yahoo! Mail, Hotmail, Apple Mail and LinkedIn are just several examples of sites that accept CSV files.
Note: A CSV file is one with “Comma-Separated-Values.” This is a common import file type to many accounting and financial software. When creating this export, select what character you would like to be placed between each value/column (delimiter). Then, when you go to import this, enter the same character as the delimiter and your software will automatically pull your information into proper rows and columns.
Here's how:
Log into your Shoeboxed account and click on Business Cards. From here, you can select the desired business cards, click the Export Selected option and your file will start to download.
How do I import my business card contacts into Google Contacts or Gmail?
Follow the instructions to download a CSV file of your business card contacts.
Use a text editor and delete the first 3 lines which will result in having the headers at the beginning of the file.
Log into your Gmail account and go to your Contacts.
Choose the More drop-down menu and select Import.
Click Choose File and select the CSV file you downloaded from Shoeboxed.
Click Upload File to complete the import.
How do I import my business card contacts into LinkedIn?
Want to export your business card contacts to LinkedIn?
Here's how:
Follow the instructions to download a CSV file of your business card contacts.
Use a text editor and delete the first 3 lines which will result in having the headers at the beginning of the file.
Log into your LinkedIn account, hover over Contacts, then choose Add Connections.
Click the option for Any Email, and then click Upload Contacts File under More ways to connect.
Click Choose File and select the CSV file you downloaded from Shoeboxed.
Click Upload File to complete the import.
How do I import my business card contacts into Microsoft Outlook?
Microsoft Outlook is a business and personal email management tool and calendar software to help you stay in touch. Want to export your contacts into Outlook?
Here's how:
Follow the instructions to download a CSV file of your business card contacts.
Use a text editor and delete the first 3 lines which will result in having the headers at the beginning of the file.

In Outlook, click File and select Import and Export.
Select Import from another program or file and click Next.
Choose Comma Separated Values (Windows). Choose the file that you downloaded from Shoeboxed and click Next.
Select the Contacts folder and click Next.
Depending on your settings, you may need to adjust how Outlook maps the fields in the Shoeboxed export to its own fields, but it should work if you don’t adjust anything and just click Finish.
How do I export my business cards as PDFs?
Want to export your business cards as PDFs?
Here's how:
Log into your Shoeboxed account and click on Business Cards.
Click on the business card that you wish to export.
From the viewer, click on Download PDF

How do I import my business card contacts into Hotmail?
Here's how:
Follow the instructions to download a CSV file of your business card contacts.
Use a text editor and delete the first 3 lines which will result in having the headers at the beginning of the file.
In your Hotmail account, go to Contacts then click Manage.
Click Import and click on the option for Outlook, which will allow you to select the CSV file you created from Shoeboxed.
Click Import, and your contacts will be imported into Hotmail.
How do I import my business card contacts into Yahoo! Mail?
Here's how:
Follow the instructions to download a CSV file of your business card contacts.
Use a text editor and delete the first 3 lines which will result in having the headers at the beginning of the file.
In your Yahoo! account, click on Contacts then select Others.
Select the option for A desktop email program.
Click Choose File and upload the file you created from Shoeboxed.
Click Continue, then choose the contacts you want to import.
Click Import, and your contacts will be imported into your Yahoo! Contacts.
How do I import my Shoeboxed business card contacts into Apple AddressBook and my iPhone?
Here's how:
Follow the instructions to download a CSV file of your business card contacts.
Use a text editor and delete the first 3 lines which will result in having the headers at the beginning of the file.
In Apple AddressBook, click File, then Import and select Text File.
Choose the CSV file you downloaded from Shoeboxed.
Make sure the AddressBook columns match up with the CSV file columns, as this may not be done automatically, then click OK and your contacts will be imported.
eReceipts
How to Setup Gmail Receipt Sync
In your Shoeboxed account, navigate to Integrations or visit https://gmailreceiptsync.shoeboxed.com/.
Select manage or connect Gmail Receipt Sync and then click “Link my Gmail account.”
Once you’ve selected the Gmail account you’d like to connect, you will be prompted to sign in and authorize Shoeboxed’s access to your account. Once you authorize access, you will need to select the Shoeboxed account that you will be connecting your email to.
What happens next?
After you've set up the sync, we will transparently vet your new emails and automatically pick out receipts to submit to your Shoeboxed account. Those receipts are then labeled “Sent to Shoeboxed” in your Gmail.
Looking for other options?
You can also archive receipts from any email by sending to your personalized Shoeboxed email address.
Let’s get started!
How do I submit receipts by email?
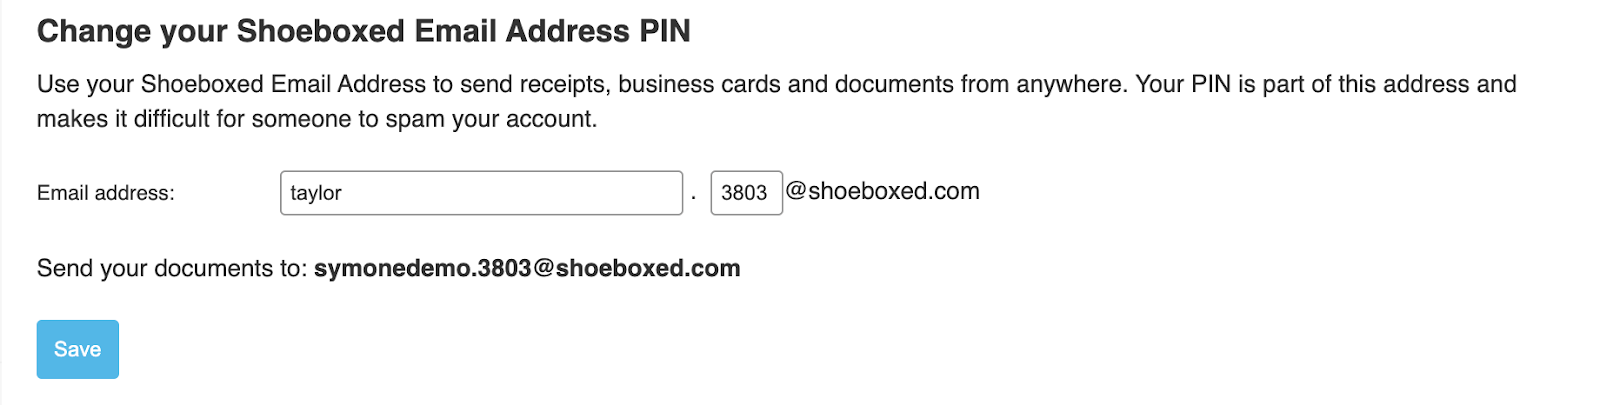
We offer a handy Shoeboxed Email Address, which is unique to your personal Shoeboxed account. This address looks like [email protected]. Any receipt sent to your Shoeboxed address will be automatically added to your Shoeboxed account.
Since we automatically form your Shoeboxed Email Address from your username and an auto-generated PIN, we also offer the option for you to change both of these to personalize your email address and make it easier to remember.
To change your username:
Log into your account, click on the user icon in the top right corner then select Account settings.
Scroll down, enter a new username and click Save.
To change your PIN:
Log into your account, click on the user icon in the top right corner then select Account settings.
Scroll down, enter a new PIN and click Save.
Accepted Attachment Formats
For .jpg, .jpeg, .png, .gif and tiff attachments or images that are contained in an email body that are lower than 10KB will bounce back and a notification email will be sent to you with the file name. In most cases they will be logos, signatures, etc that are contained within an email body.
Note: There are no restrictions for pdf files.
Affiliate Program
What is the shoeboxed affiliate program?
Our affiliate program allows you to get paid for linking Shoeboxed from your website, blog or non spam emails. You get paid for each new paid Shoeboxed member who signs up through your links.
How to get started making money:
- Submit the brief application to join our referral program.
- Get your referral link and share it with anyone that can benefit from Shoeboxed.
- Earn 10% of fees collected for an entire year.

What type of affiliates are there?
We have three different affiliate programs:
Bookkeepers: Earn 20% for every client introduced to Shoeboxed!
Existing Customers: You will receive 10% of all referrals that sign up from your link! This reward is valid for one year.
Partners: Earn 10% on commissions earned through marketplace!
However, it is important to note that if your referral cancels their Shoeboxed subscription, the referral reward will no longer be valid.
If you have any other questions about the customer referral program, don't hesitate to contact us at ([email protected]).

Can I participate in the Shoeboxed affiliate program?
Can I participate in the Shoeboxed Affiliate Program even if I don’t have a website?
Yes! You can earn commissions by placing affiliate links in non-spam email. Text links for email are available in your Commission Junction account. If you have any questions about how to use affiliate links in emails or what kinds of emails are appropriate for publishing affiliate links, please contact our support team at [email protected].
Can sites outside the United States, Canada and Australia join?
Yes, but since Shoeboxed is primarily used by customers in the US, Canada and Australia, we invite affiliates who cater to customers in these countries.
Please contact [email protected] for any additional questions regarding our affiliate program.
